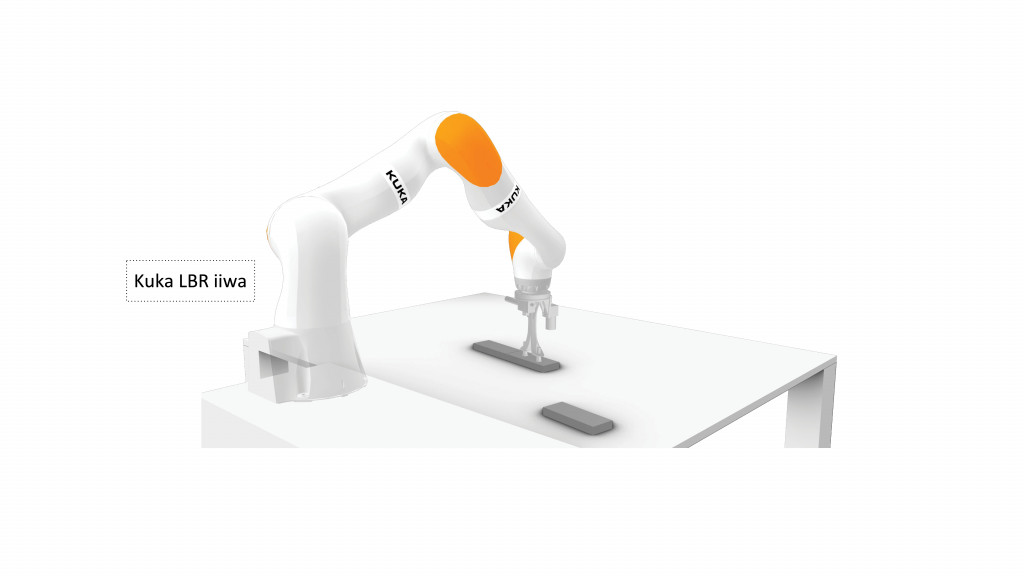
IAAC – Master in Robotics and Advanced Construction
Workshop 3.2
Tutor: Ethan Kerber / Chair for Individualized Production, RWTH Aachen University
Tutor’s Assistant: Kunaljit Chadha / IAAC
University collaborators: Chair for Individualized Production RWTH Aachen University and Robots in Architecture Research LLC
The workshop was an initial beta test of KUKA|crc (Cloud Remote Control) software development by Sven Stumm / Robots in Architecture Research LLC.
Magnetic Bridge
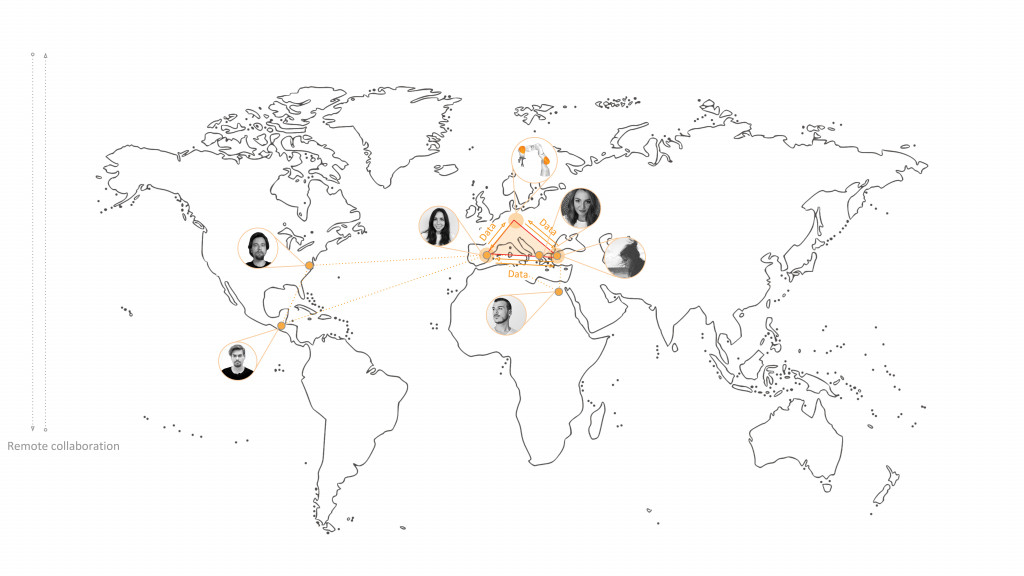
This workshop took place during the COVID-19 pandemic. Having to shift to working remotely, along with the constraints came the opportunities. During this workshop, we were able to develop a structure by remotely controlling a robot from different parts of the world. This was made possible by collaborating with the team at University of Aachen and utilizing their robotics lab to test and build our prototype.
The tools that were used for this workshop are: Kuka|prc and Kuka|prc-cloud, magnetic bricks …………………………………………….name tools……………
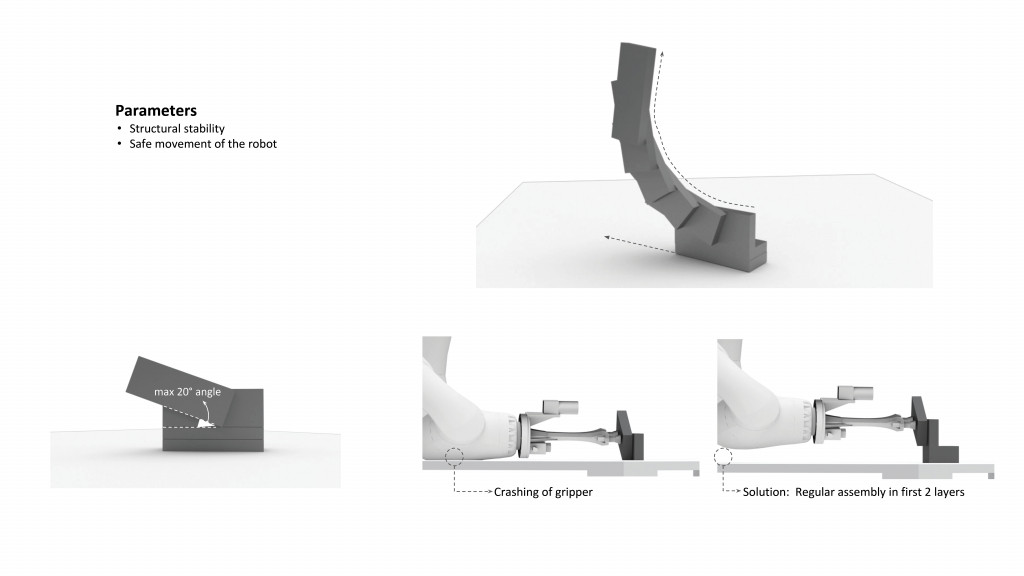
Workshop Opportunities
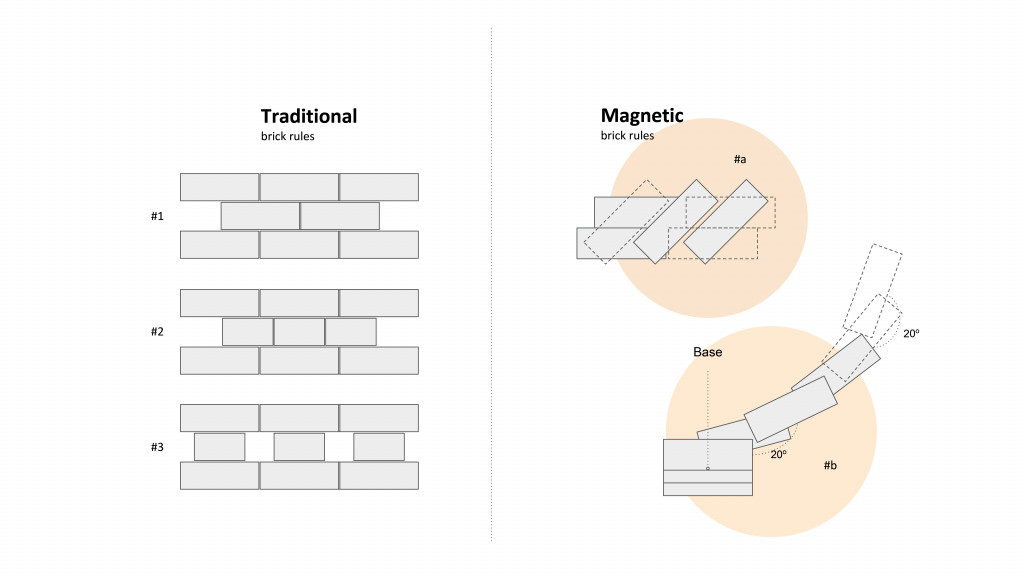
A combination of magnetic bricks, remote control and responsive design were the main elements in the development of this project.

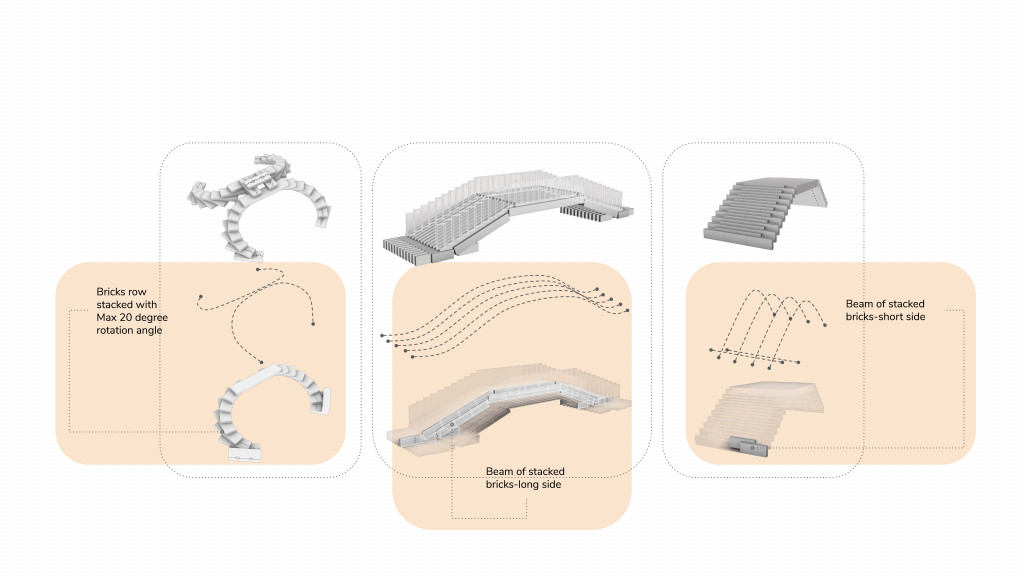
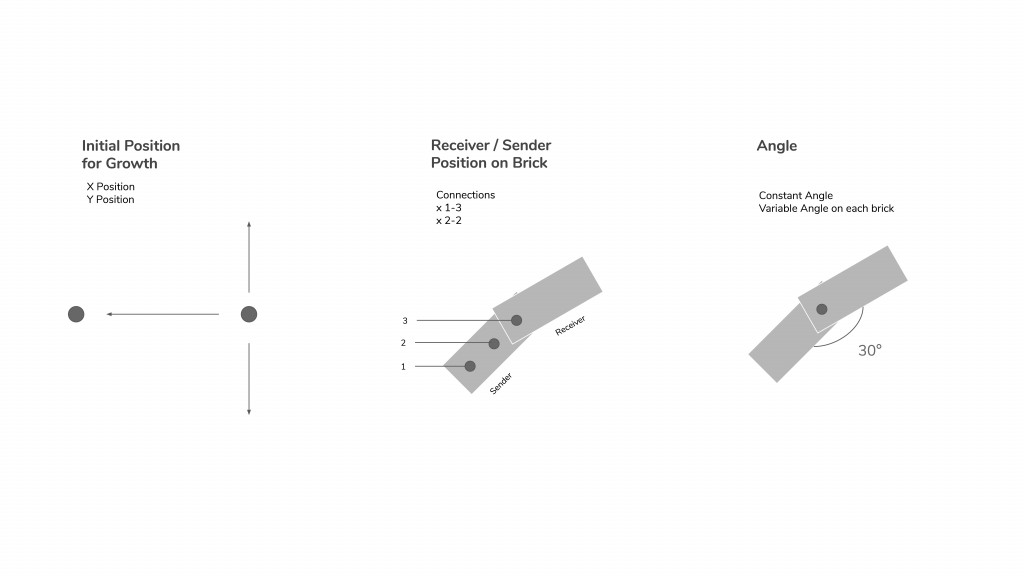
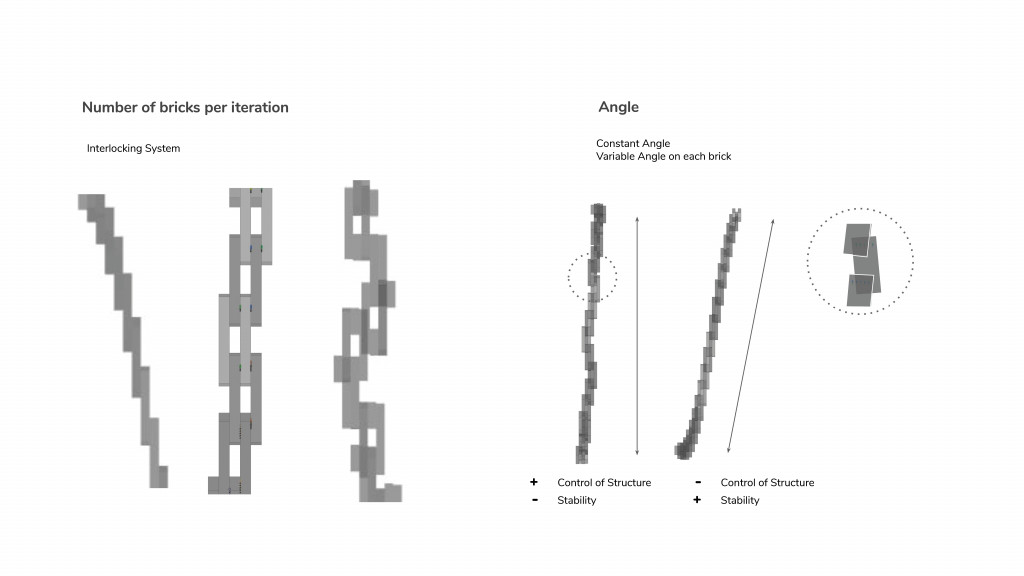
Magnetic bricks provide an opportunity to push the boundaries of design and from traditional stacking we are able to experiment with different configurations of diagonally overlapping and stabilizing the structure with the assistance of a robotic arm. The design rules require the angle of inclination to be 20 degrees maximum. In addition, taking into account the limitations of constructability from the robot, we design a base that will prevent the robotic arm to collide with the table.
Remote Control
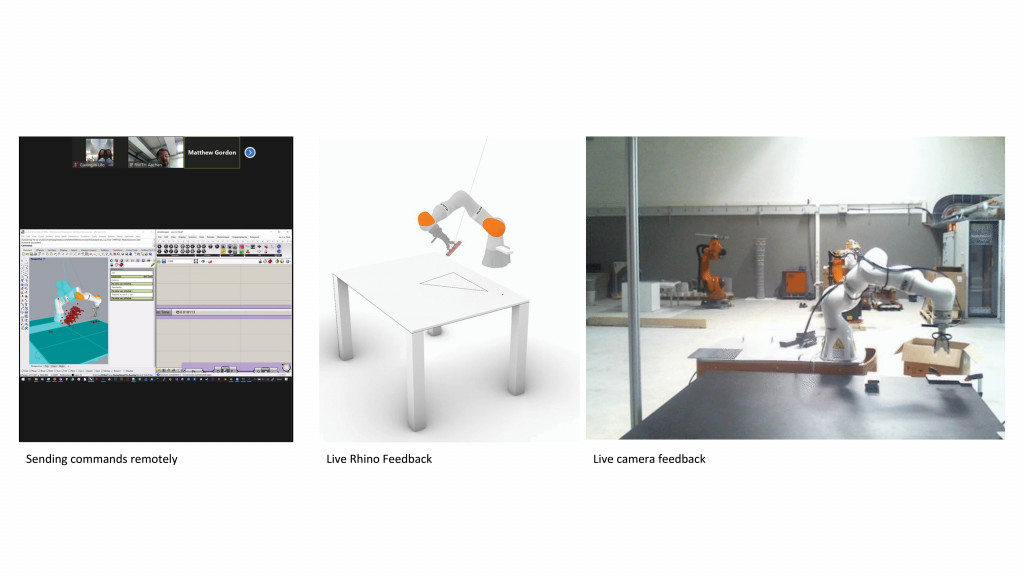
All the team members come from a different part of the world. Our paths crossed at IaaC, where we came to take advantage of the state of the art laboratories and equipped facilities. However, due to the pandemic and the quarantine, access to the equipment was impossible. This challenge pushed us to find new ways of communication and collaboration between team members, and ways to remotely use the tools as much as possible.
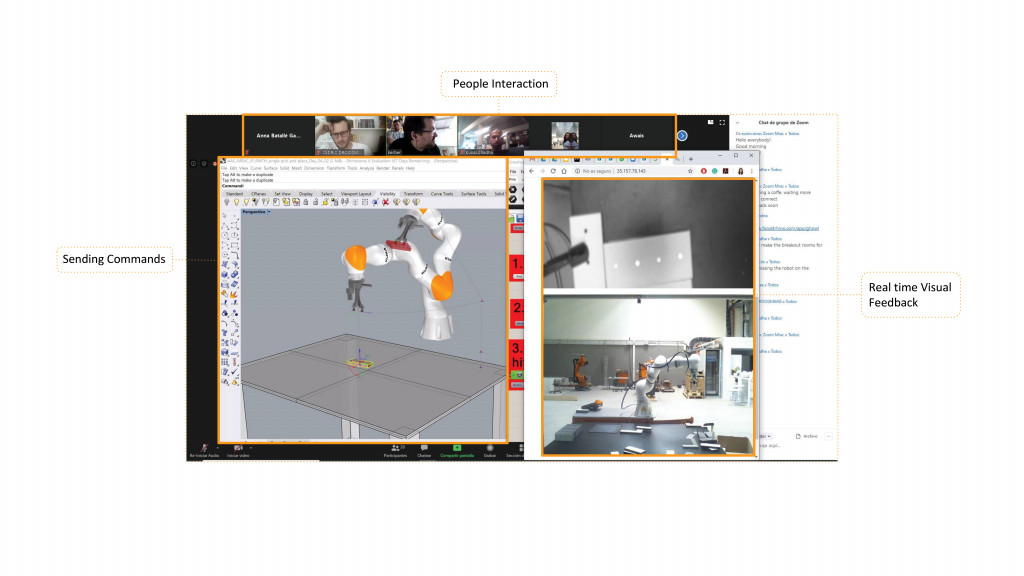
Through communication platforms, such as zoom, websites that made it possible to view real-time feedback from a camera and tools that made it possible to send commands in real-time, collaboration was flawless. While we were all confined in our homes, we were still able to preserve the collaborative working environment without the necessity to be physically present.
………next image is video……………..
Workflow:
The first step was to develop the design by applying the rules that the magnetic bricks have to follow. After the design was completed, the next step was to integrate the geometry into a grasshopper definition where we were able to run a simulation and detect possible collisions or out-of-reach motions of the robot. Such issues were caught and resolved beforehand. Once the simulation worked, we connected to a client portal and used Kuka|prc-cloud to send the G-code to the robot; this could be done from anywhere in the world. In our case, the robot was located in Aachen, Germany, while the team members were in different countries. We were able view the motion of the robot from two different cameras that were attached; one on the robot and one in front of it.
It is worth mentioning that, if other members were connected to the client, it was possible to visualize the motion of the robot in real-time inside Rhino. As such, someone could be working on a design or manipulations part of the geometry inside the software, while being able to see the robot moving and placing the bricks. Furthermore, once the robot reached the final location to place the brick, the geometry was baked at the drop-off location. Thus, all the members connected to the client were able to see the structure being built inside the software and, if necessary, plan accordingly for the next piece. If the member who was running the robot at the time chose to release the client system, another member could continue building the structure from the spot that the previous one left off, or even change the design midway and while building on top of the previous one.
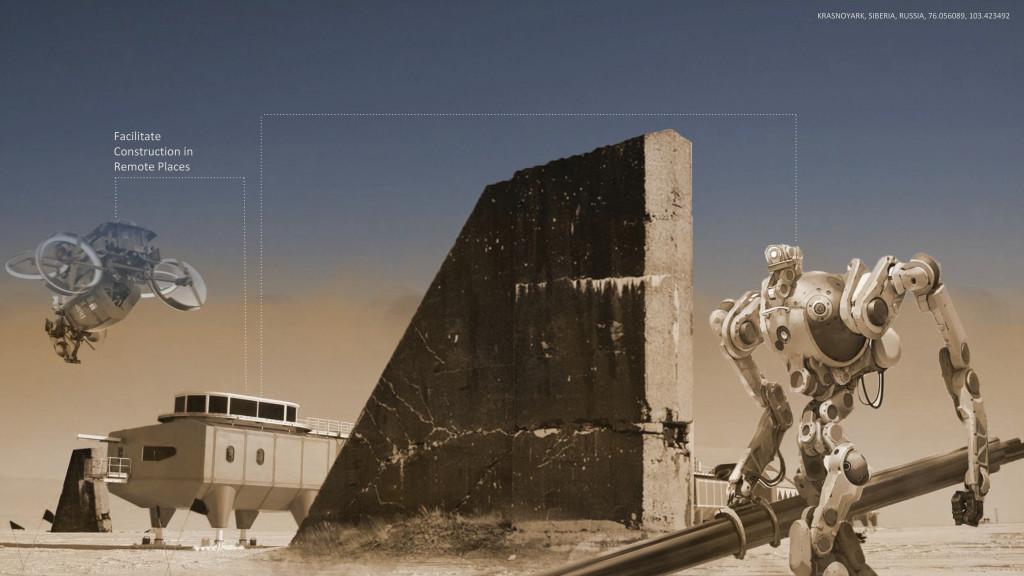
This gave us the opportunity to imagine scenarios that a few weeks before the confinement, no one would have been able to consider. We started questioning what the future of construction make look like. Not only five or ten years in the future, but also for the decades to come.
Responsive Design
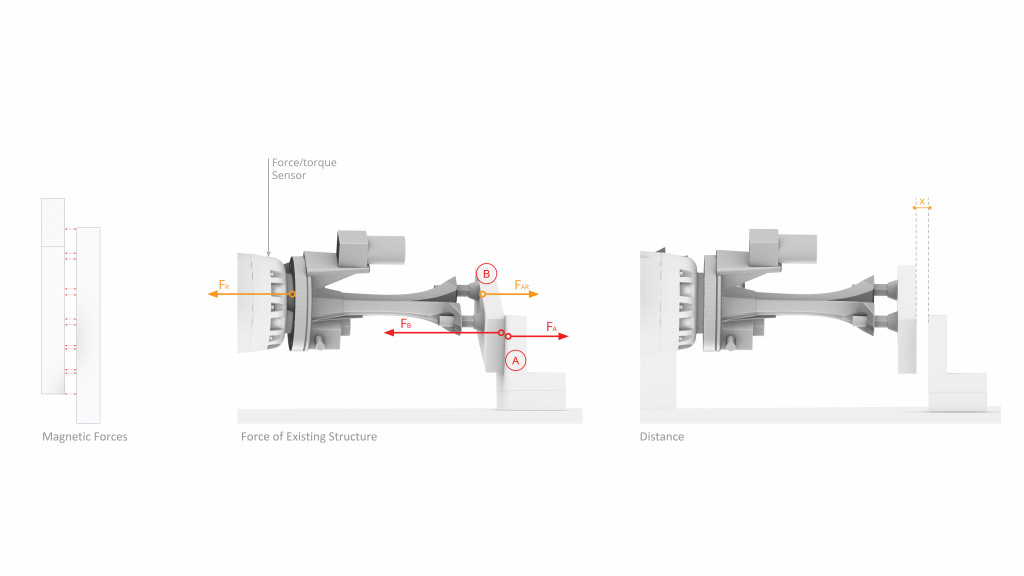
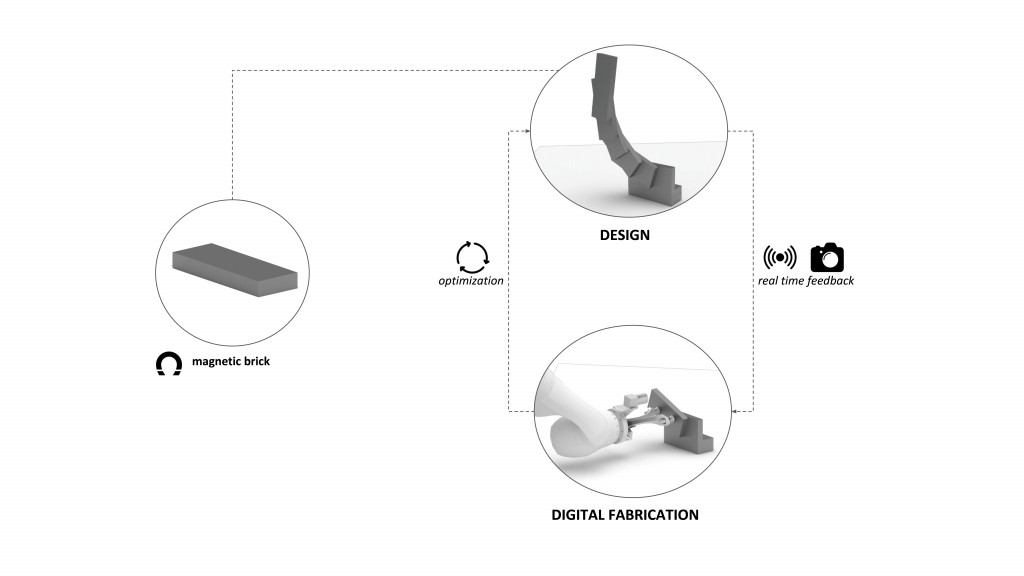
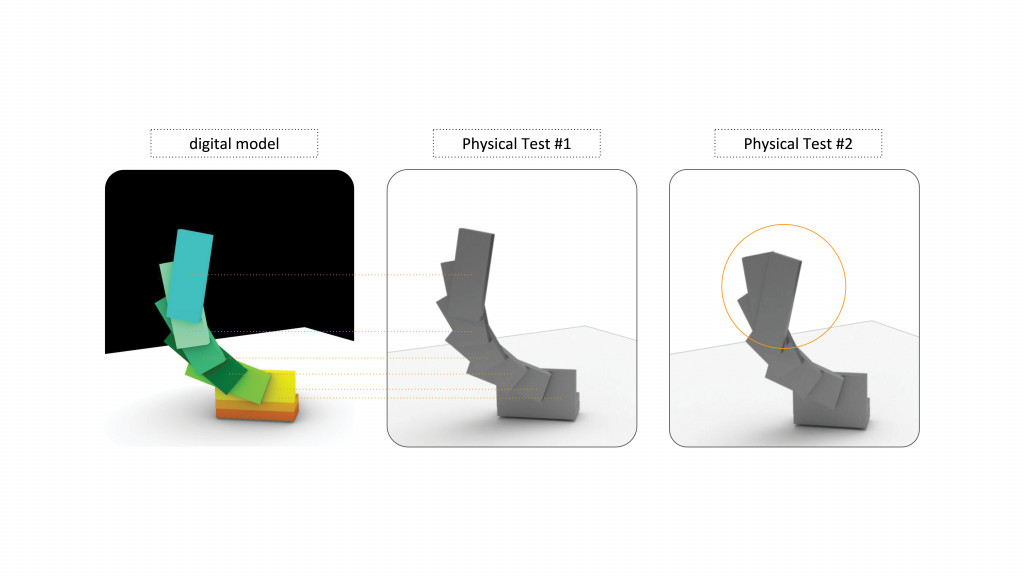
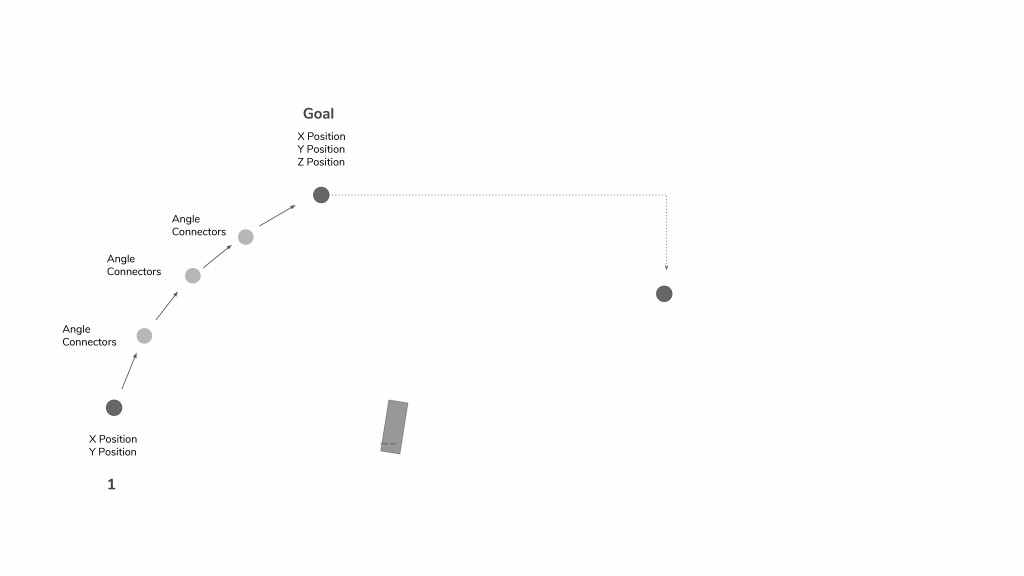
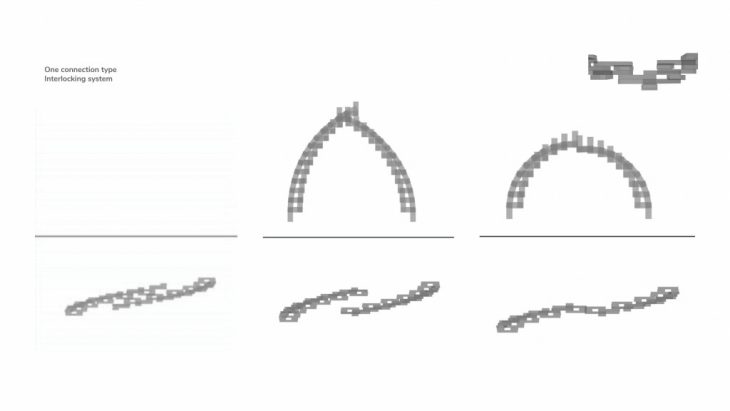
While automating the process of assembly is part of the project, the next important aspect is to adjust the robotic movement so that it responds to possible discrepancies that occur during construction. The diagram below explains the logic of using sensors and giving real-time feedback to the robot so that it can adjust its movement when it detects a disparity between the digital model and the physical outcome or to continue the process when there are no changes every time a block is being placed.
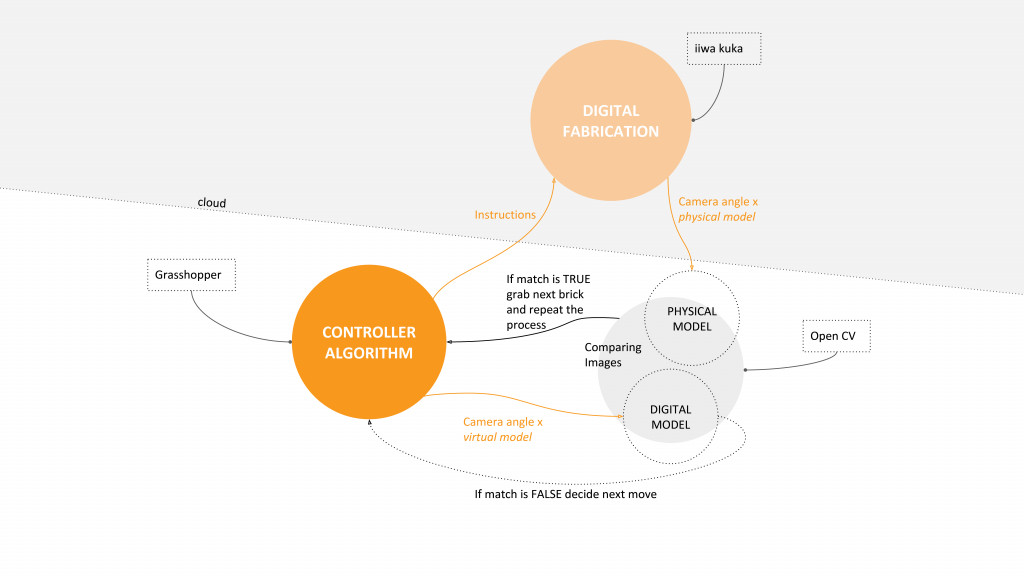
As shown below, the magnetic brick is our building element. We take upon a challenge to test how far we can build before magnetic and gravity forces start disrupting the physical outcome. The cameras on and around the robot are used to give us feedback every time a piece is being placed. Through computer vision we are able to detect the amount of deviation and act accordingly.
One reaction we expect from this experiment is the amount of deviation that may result when the bricks are close enough to where their magnetic forces start acting and, thus, impact the assembly that has already been placed. In addition to the camera feedback, we are able to examine the data we get from the force/torque sensor of the robot and compare the two.
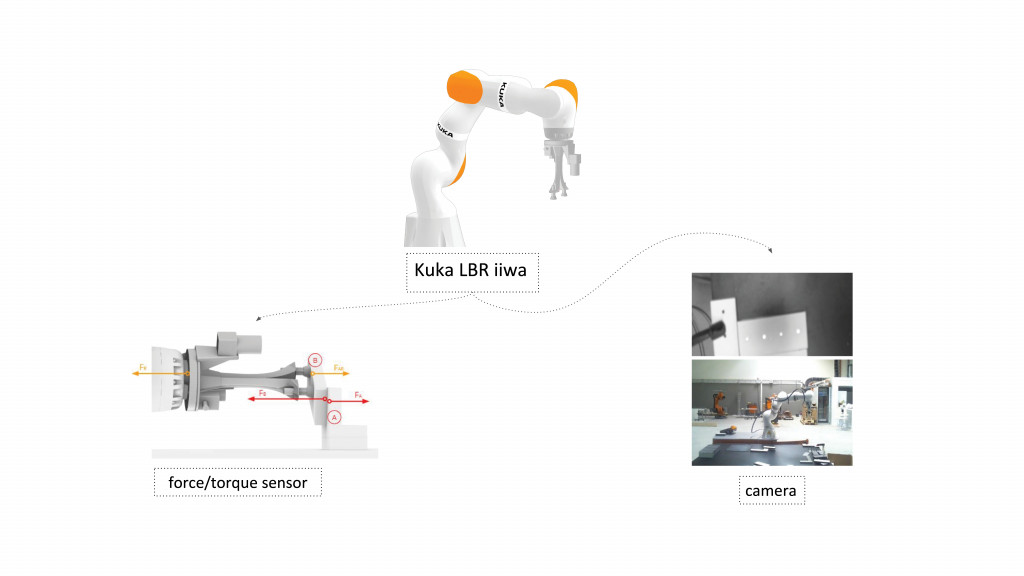
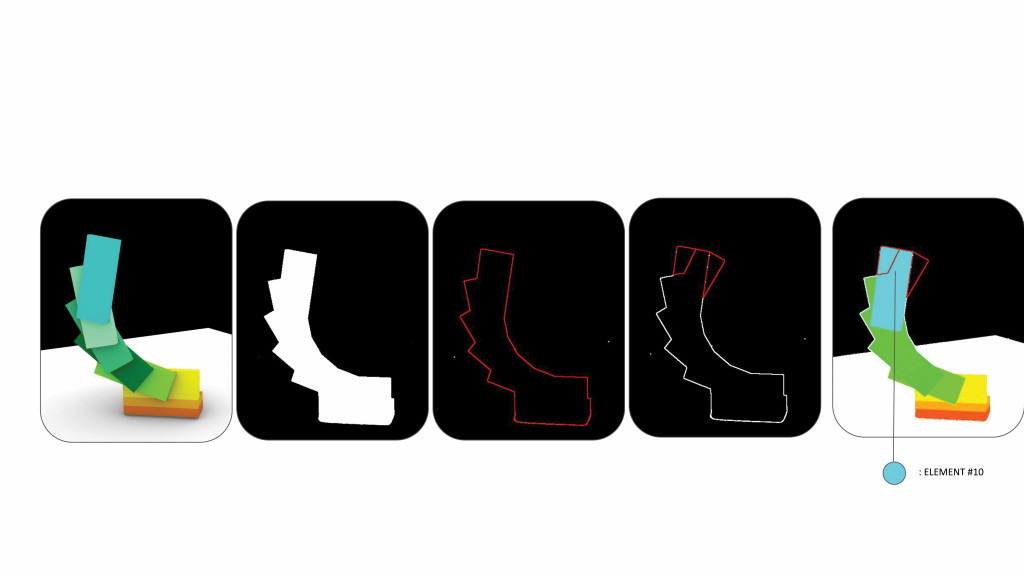
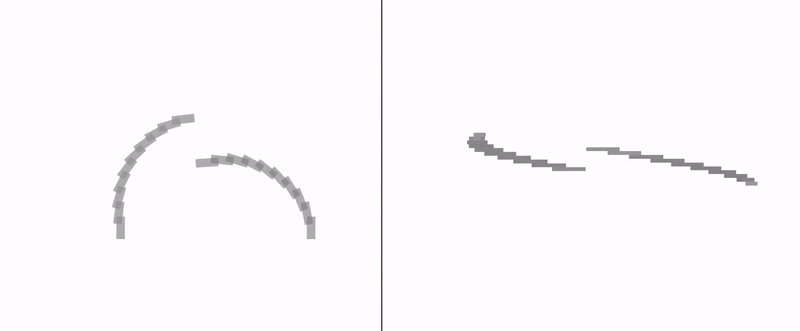
Image Filtering, Contour Detection and Analysis
On the diagrams below we start from the digital model, which is the targeted result and as the robot executes the commands, we implement edge detection to calculate the deviation of the final assembly (shown on the right side of the sequence below).
Design Exploration
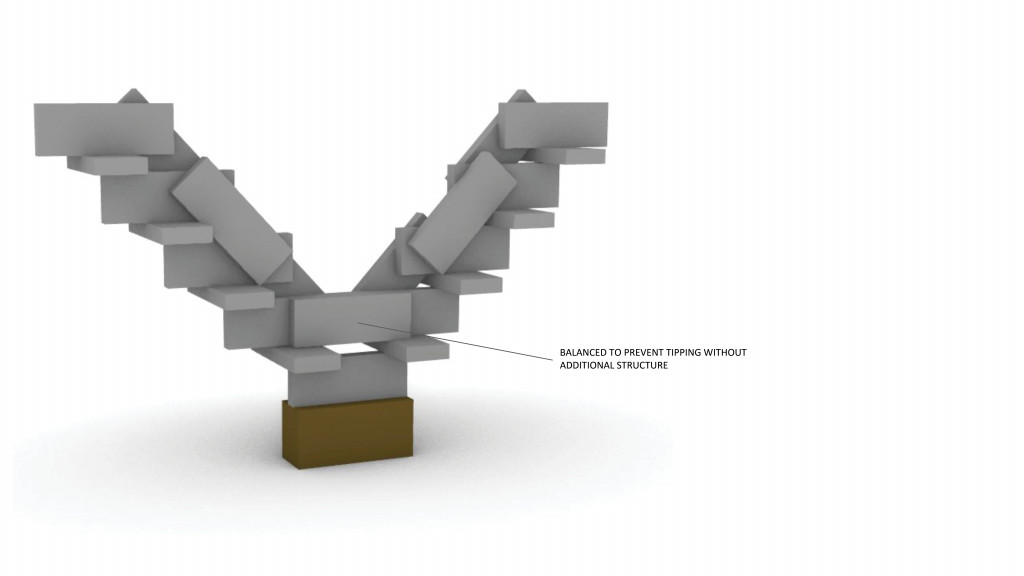
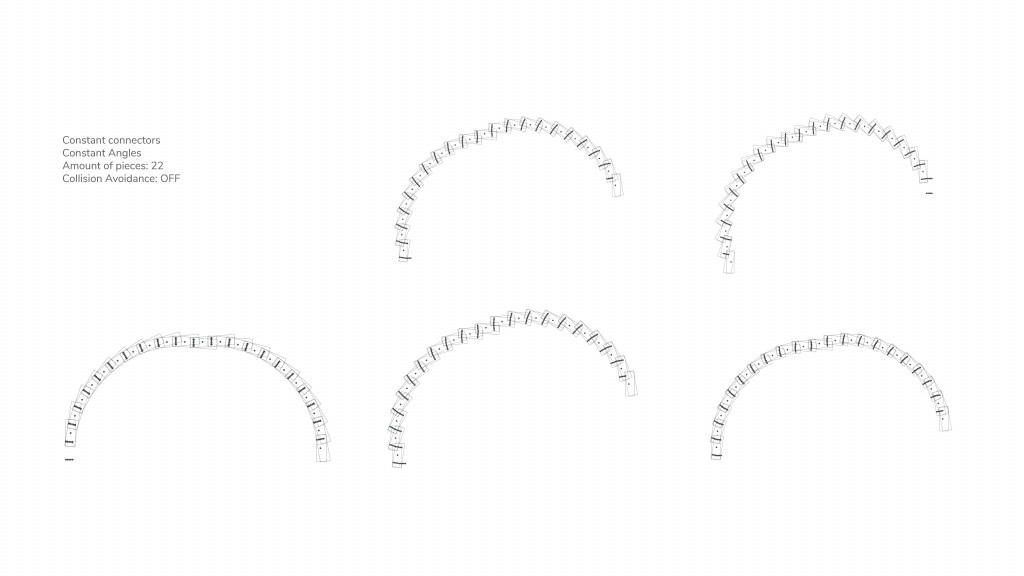
In the diagrams below, from left to right; the first design exploration is done with a single row of bricks stacked on top of each other with a maximum rotation angle of 20 degrees. On the second one, the bricks connect to make a beam and they array on the long side. The third exploration is similar to the second one, except in this case the arraying of the beams occurs the short distance.
Iterative Assembly Inputs
Iterative Assembly Outputs
Something something 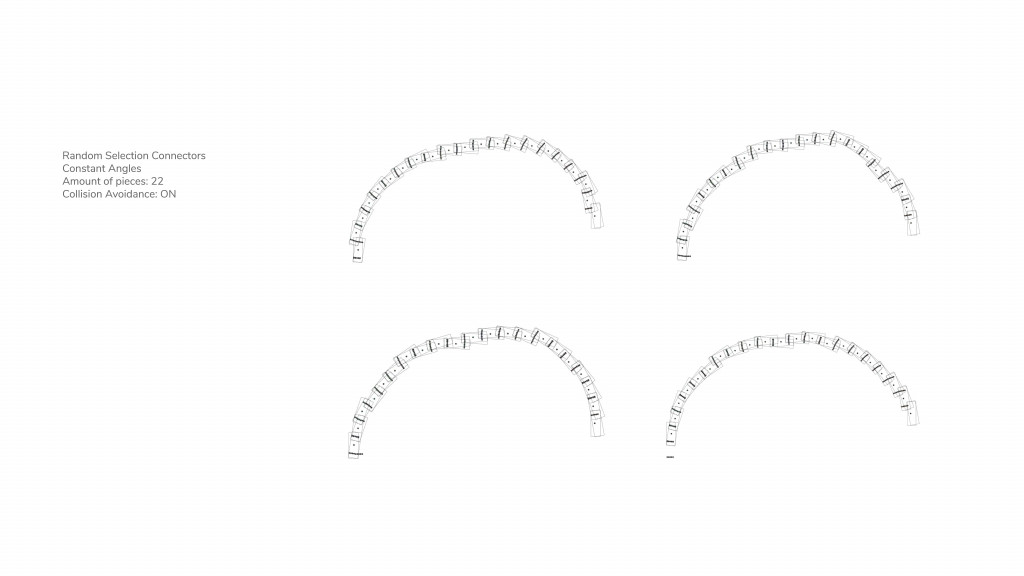
Evolutionary Solver for Agents 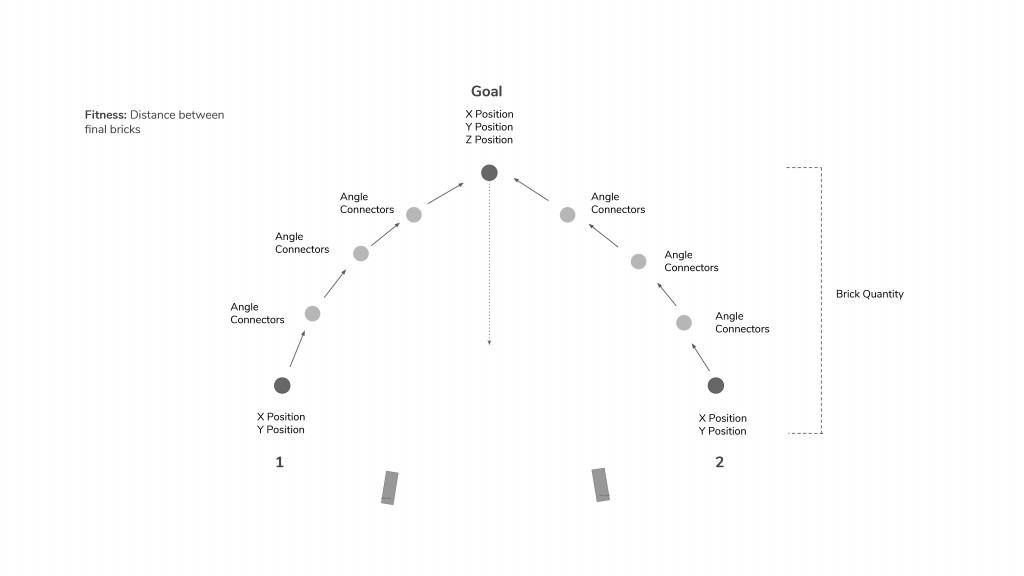
Evolutionary Solver Process 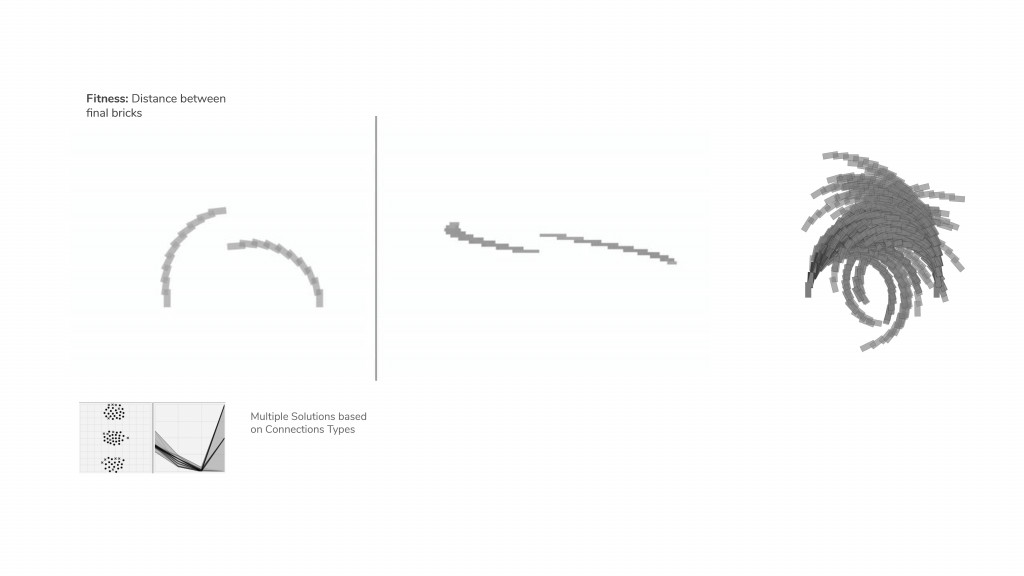
Best Results from Galapagos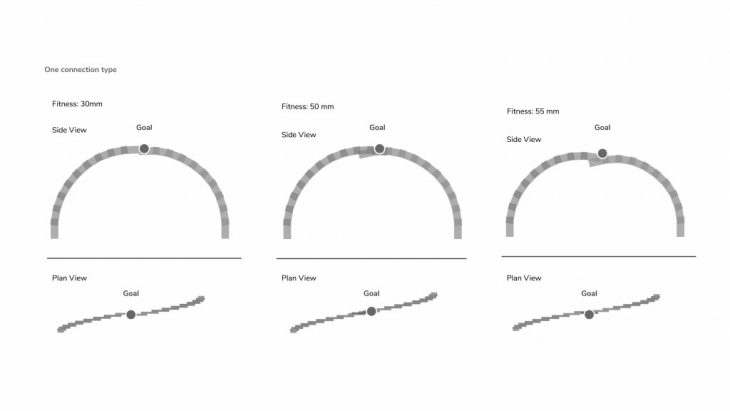
Best Results from Octopus 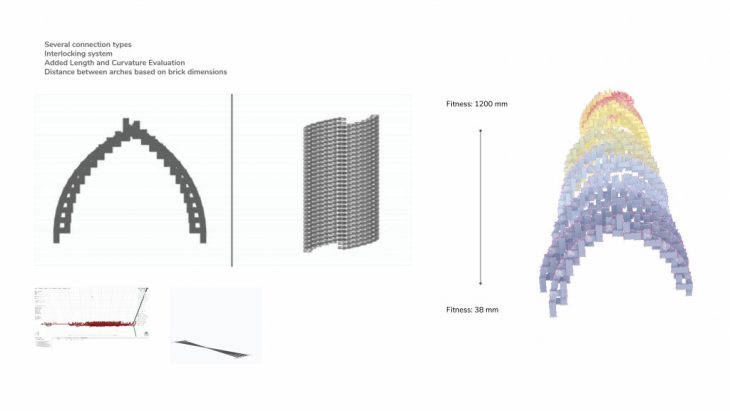
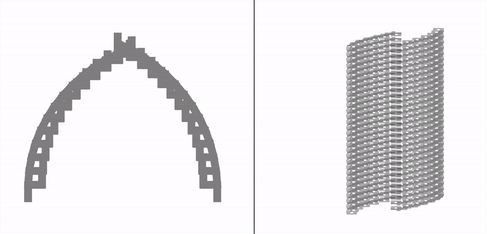
First Design Exploration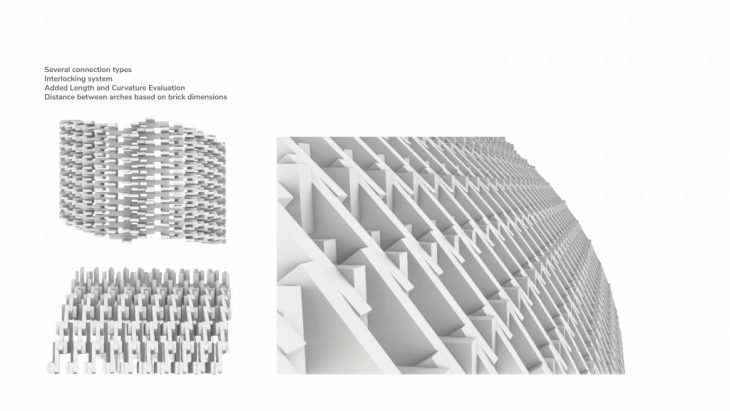

Fabrication Constraints