LASER CUTTING
Project: Decomposition of an hexagrid
Material: Plywood
Concept: The aim of the project is to design a pattern that could be laser cut to bend a surface of a rigid 3 mm thick wooden plate by using hexagons as a base for the composition.
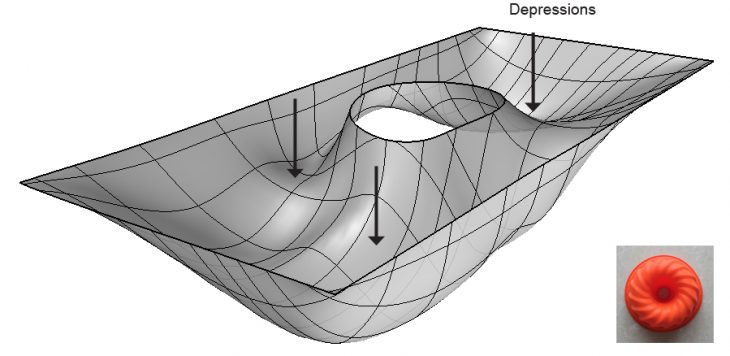
Methods: In order to make a flexible surface, I applied and deformed a hexagonal grid. Using an attractor point to stretch the cells in the x-direction and interpolating all the vertexes, they would deform on a scalar sequence. Finally, by offsetting the edges I defined the cutting layer. I expected the plate to be more flexible in the center.
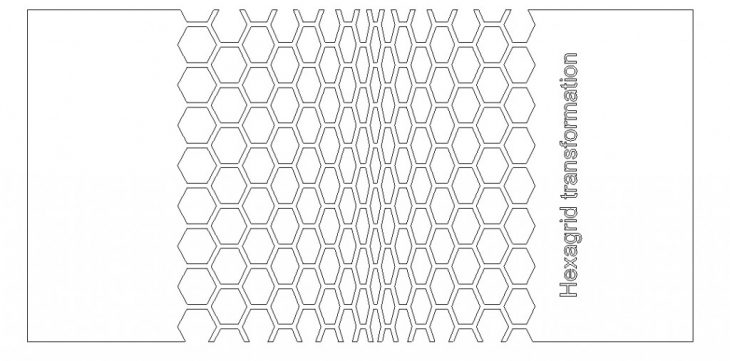
Top view / Wireframe
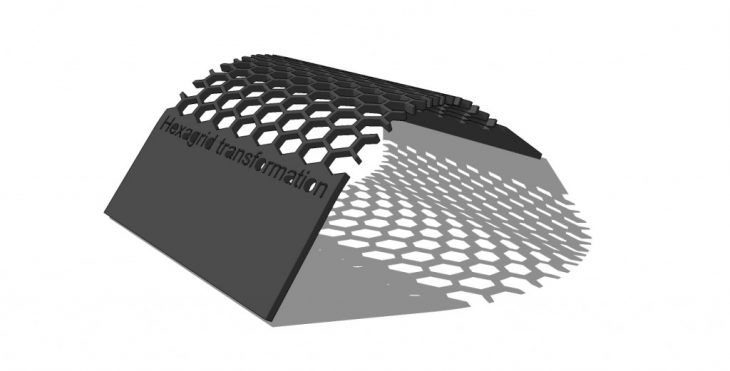
3D Sketch
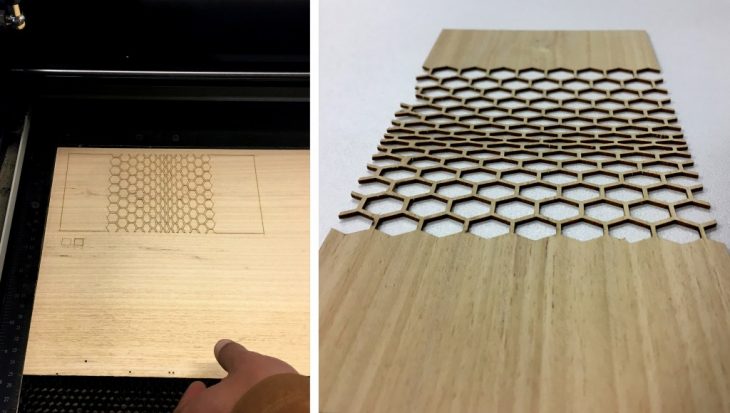
Process
MILING
Project: Irregular Jelly Bowl
Material: Foam
Concept: Inspired by a jelly bowl, I created a playful surface that can be milled in a Foam slab to potentially become a mold.
Methods: To shape the surface, I started by defining the edges of the potential “bowl” and marking a planar area in the center not to be carved. To accomplish a fun effect I used the command rebuild to make wavy yet flat UV lines in its interior. Finally, I deformed the surface vertically to obtain the bowl recipient effect leaving some uneven depressions and trimming the edges to keep them sharp. I chose to make transversal lines separated by approximately 9 mm to be engraved in the foam with a 6 mm round milling cutter to finish the wavy effect.
Process Top Views
3D Concept

Profiling
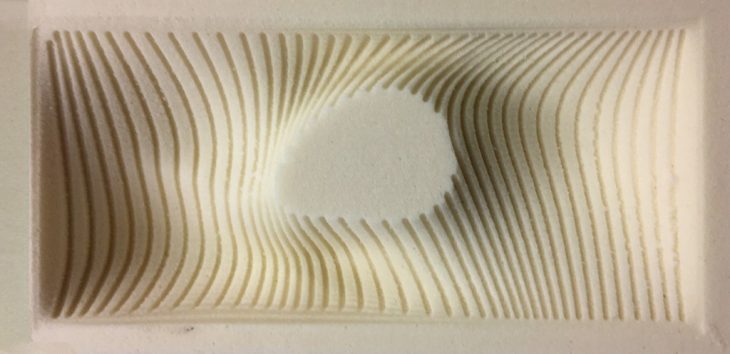
Mold Picture
3D PRINTING
Project: Liquid Mold
Material: PVA
Concept: The aim of the project is to 3d-print a mold in PVA (water soluble material) later to be cast in transparent resin. Inspired by liquid shapes and transformations, I managed to create a combination of playful forms.
Methods: The limit of the mold was the inside of an open cube (5x5x5 cm). To shape the mold, spheres were created attached to the edges and walls of the cube, making the surface of the future casting not a regular cube. Two volumes in the shape of a worm were placed in the middle, reaching opposite walls of the cube, to create liquid paths from one side to the other. To create the worms, circles and ellipses ran through different rails across the cube following the swift function in Rhino, giving two open surfaces as a result. Finally, the surfaces were trimmed and joined to become solids for the printing.
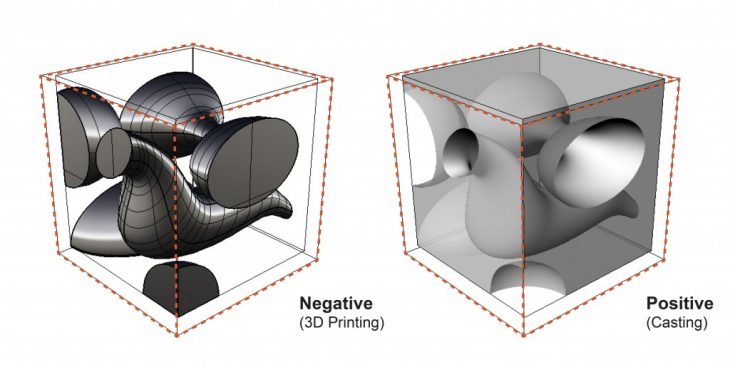
3D Concept

Views
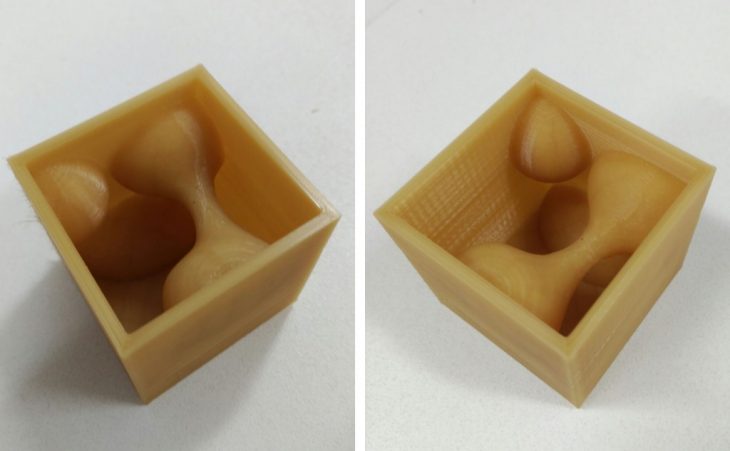
3D Print
Introduction to Digital Fabrication is a project of Iaac, Institute for Advanced Architecture of Catalonia at Master in City and Technogy in 2016/2017 by:
Student: Laura Marcovich
Faculty: Djordje Stanojevic, Kunal Chadha