Welcome to Dets!
Detailing. Made. Easier!
Website-Link
Dets is a Rhino plugin designed to make the annotation process easier. It contains commands to enable users to quickly add annotations, modify the style of existing leader lines, and automatically rearrange leader lines for cleaner formatting. With preset styles and scale options, users can easily maintain consistency and clarity between their drawings.
Getting Started
Installation
Dets will be made available as a .rhp file on Food4Rhino for Rhino 7 can be installed with the Rhino plugin manager.
User Notes
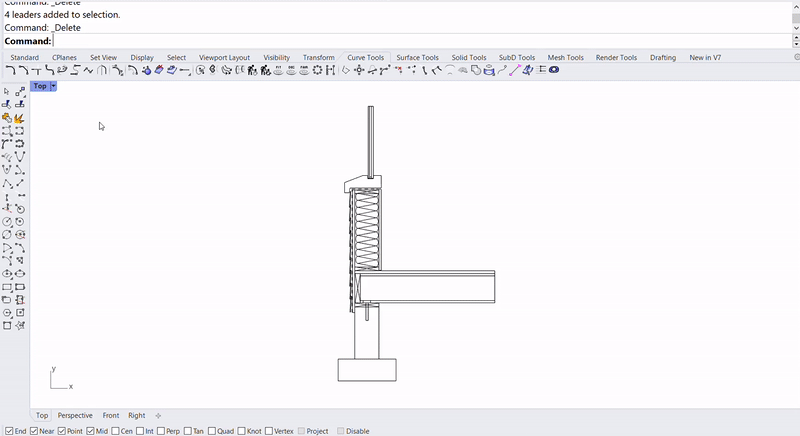
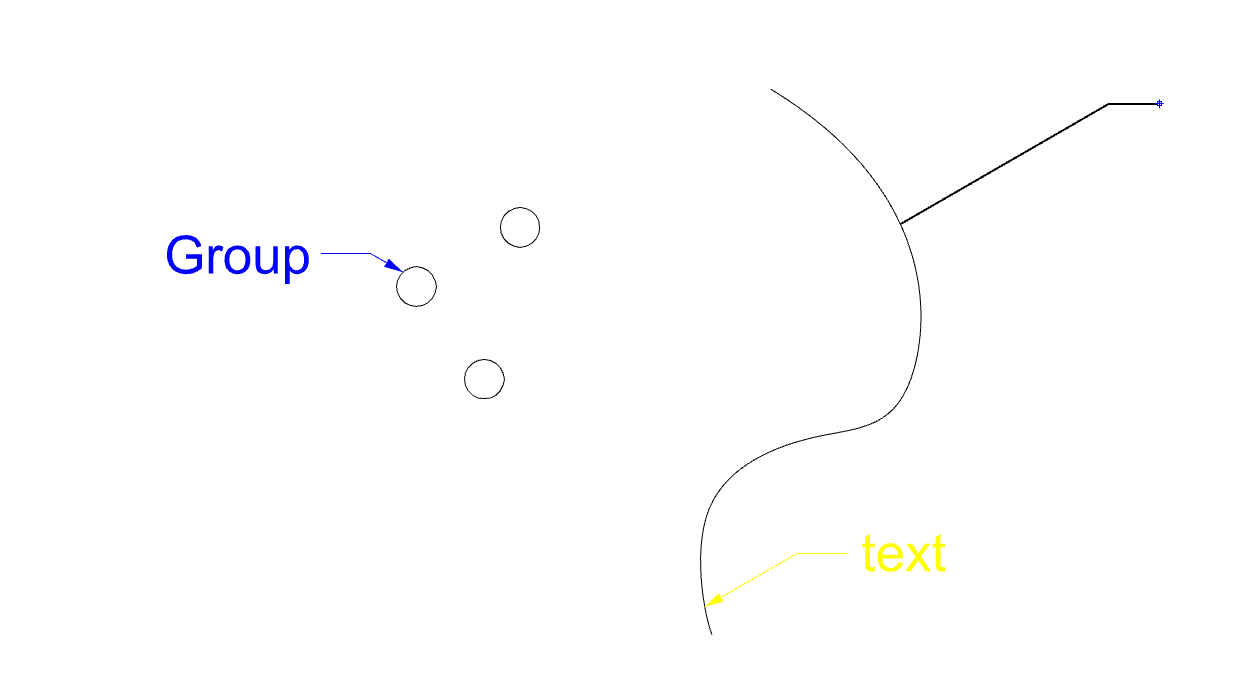
Annotations can only be added to line/curve or brep elements. If an object to be annotated consists of multiple parts, its parts must be grouped together first, otherwise each element within the object will be attributed a leader line.
Behind The Scenes
Motivation
As a former facade engineer, I spent many late nights adding annotations to my drawing sets. It was never a very difficult task, but one that always took much longer than expected. There had to be some way to automate the process. This is when the idea for Dets was born. Whether you are very picky about the formatting of your annotations or just short on time, Dets can work for you.
The Code
The Dets plug-in is made with C# and RhinoCommon, a .NET SDK for Rhino.
The Dets documentation website was made with Vue and Tailwind CSS.
The Dets documentation website was made with Vue and Tailwind CSS.
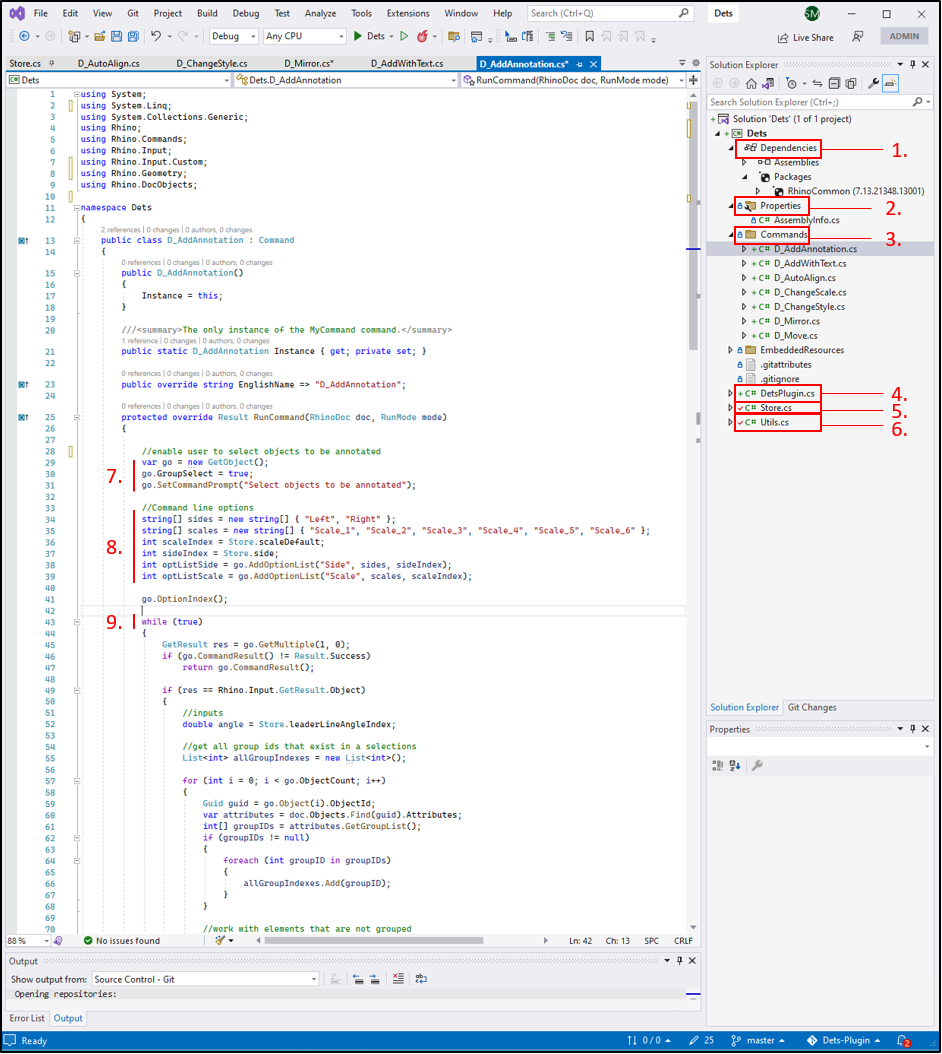
Project Layout
- Dependencies: Includes required assemblies and packages. The RhinoCommon version used in the plug-in is referenced here.
- Properties: Includes assembly info such as the plug-in icon and guid for the project
- Commands: Includes all the commands of the plug-in
- DetsPlugin.cs: A required file thaPt defines the instance of the plug-in.
- Store.cs: A place where changeable variables can be stored, for instance, text-height or pointer type.
- Utils.cs: File where all the utility functions for the plug-in are kept.
- Construct ‘GetObject’ and define properties such as which type of objects can be selected, how many, and the command prompt.
- Define and add command line options to the ‘GetObject’.
- An infinite while loop is created so that the user will always be given the choice to change command line options. It isn’t until the user does select an object/s that the loop is broken out of.
Add Annotation
Command: D_AddAnnotation

Description
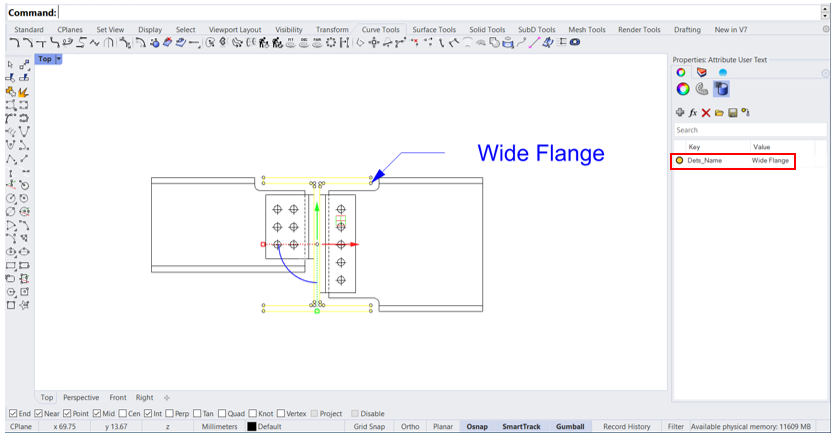
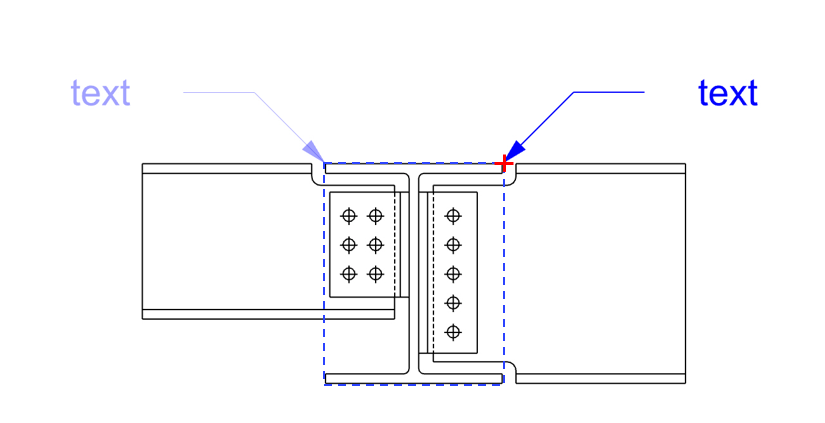
Add a leader line to an object or group of objects. Leaders will automatically snap to the right-most or left-most point on the object or group of objects. By default, all leader lines will be drawn at a 45 degree angle, with a solid triangle arrow type, and default text of “text”. If text was previously assigned to the object with the ‘AddWithText’ command, this text will be remembered and automatically applied.
Input Options
Side (Left, Right): Determines if the leader line will be oriented to the right or left of the object.
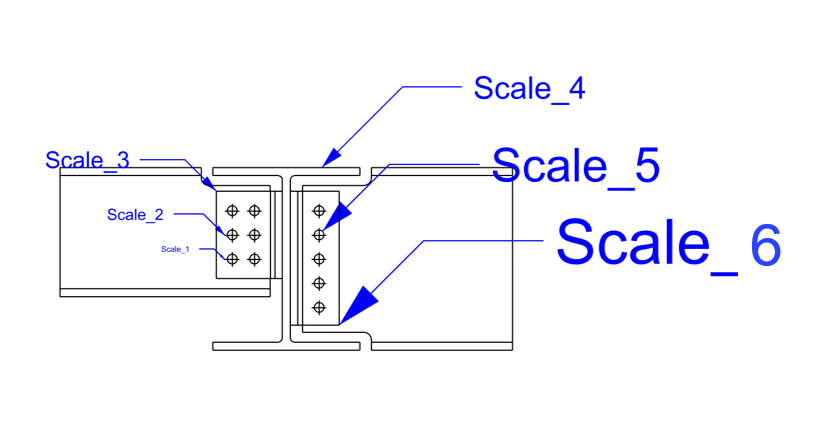
Scale (Scale_1, Scale_2, Scale_3, Scale_4, Scale_5, Scale_6): Determines the scale of the leader line drawn with “Scale_1” being the smallest and “Scale_6” being the largest.
Add Annotation With Text
Command: D_AddWithText
Description
This command behaves similarly to the add annotation command but enables the user to add text descriptions. After selecting objects to be annotated, each of the selected objects will be highlighted sequentially and the user prompted to type in the command line the object’s annotation text. Input text is stored and saved to an object’s user string.
Input Options
Side (Left, Right): Determines if the leader line will be oriented to the right or left of the object.
Scale (Scale_1, Scale_2, Scale_3, Scale_4, Scale_5, Scale_6): Determines the scale of the leader line drawn with “Scale_1” being the smallest and “Scale_6” being the largest.
Change Scale
Command: D_ChangeScale
Description
Change the scale of existing leader lines. This modifies the pointer arrow size, text height, and leader line lengths.
Input Options
Scale (Scale_1, Scale_2, Scale_3, Scale_4, Scale_5, Scale_6): Determines the scale of the leader line drawn with “Scale_1” being the smallest and “Scale_6” being the largest.
Change Style
Command: D_ChangeStyle

Description
Change the style of existing leader lines, including arrow type, text height, and leader line angle.
Input Options
Pointer (OpenArrow, Solid Triangle, None, Dot): If “Dot” is selected, the leader line will point to the center of an object or object group. Otherwise, the leader line will point to the edge.
Text Height: Use the command line to enter in a value between 0.1 and 100 to change the text height of the leader line.
LeaderAngle (Zero, Thirty, FortyFive, Sixty): Choose between 4 different preset angles.
Mirror
Command: D_Mirror
Description
Switches the side of the object or group that the leader line lies on. Keeps the leader line start point snapped to the outermost left or right point of the object. If the leader line pointer is a “dot”, the leader line will switch sides, but the start point of the leader line will stay in the same place.
Technical Notes
The mirror command works by first finding the bounding box of the object or group that the leader line is point to. Next the intersection point between either the right or left side of the bounding box (depending on which side the leader needs to be mirrored to) and the object/group. Lastly, a leader line is drawn up and to the right or up and to the left from the found intersection point.
Auto Align
Command: D_AutoAlign
Description
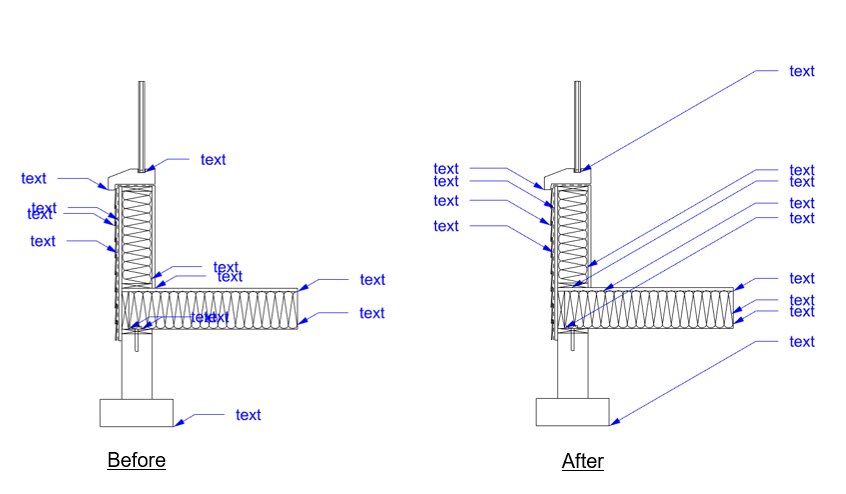
Automatically aligns text of selected annotations to the left or right and attempts to remove any overlaps present. It should be observed that for objects that are spaced too close together, it may be impossible to prevent the overlapping of some annotations. See the notes below for a description of how overlap prevention works.
Input Options
Offset Distance: This is the distance away from the outermost left or right point of the detail that leader text will be aligned to.
Technical Notes
The AutoAlign command works in the following steps:
- Identifies leader lines that have overlapping text.
- Of the objects that the overlapping leader lines point to, it finds the objects with minimum and maximum bounding box “Y” values.
- These leader lines are then moved either upward or downward half the distance of the leader line text height.
- A check is then done to test whether this newly moved leader line still intersects the object. If so, the leader lines’ points are updated. Otherwise, the leader line is not moved.
- These steps are repeated until there is no more overlapping text. However, since it can be impossible to prevent overlaps in some scenarios, the process is only allowed to be repeated for a finite amount of iterations, after which, the process stops and the final location of the leader lines is frozen.
Move
Command: D_Move
Description
Move leader lines while dynamically keeping the start point of the leader snapped to the closest point on the object.
Input Options
Fix End: When set to ‘True’, the horizontal position of the leader line end point is fixed, enabling only vertical movement. When the value is set to ‘False’, movement isn’t restricted and the end of the leader line is free to follow the cursor.
Technical Notes
The move command works by overriding the RhinoCommon ‘GetPoint’ class with a custom OnDynamicDraw method that finds the point on an object closest to the user’s mouse and draws a leader line between the mouse’s current position and this closest point.
Next Steps
Testing and Feedback
Dets is still very much in its early stages and has yet to undergo thorough testing. The next step in this process is to collect feedback from users [you] and then update and release the first version of the plug-in to the public on Food4Rhino. Please use the “Contact” tab to send any feedback or questions you might have.
Machine Learning Application
Another potential next step for this project would be to crowd-source data regarding labels and objects/annotation positions from future users and use this data to train a machine learning model to be able to predict annotation text without user input and desired formatting styles.
Resources
This project wouldn’t have been possible complete without the following resources.
RhinoDeveloper – Your First Plugin
Rhino provides very helpful, step-by-step instructions on how to set up your first plug-in.
Rhino provides extensive documentation and example files for their API. It is not always the most easy to navigate, but was very crucial to the project.
A place where kind strangers will answer all your RhinoCommon questions.
Dets is a project of IAAC, Institute for Advanced Architecture of Catalonia developed in the Master of Advanced Computation in Architecture and Design 2021/22
Student: Sophie Moore
Thesis Advisor : David Andres Leon