Aspiring Graffiti Artist
The art of spray painting a wall demands some understanding of speed, distance, and angles of spraying to achieve certain paint strokes. While experienced graffiti artists may debate on or agree upon certain techniques, our challenge was to make the robotic arm take its first steps to becoming an artist: press the spray and paint something. The goal of this project mainly was to gain an understanding of designing an end effector, of physically computing with python, of wiring pico boards to motors and power supply, and of generating a grasshopper script to conduct the movement of the robotic arm.
End Effector Prototype
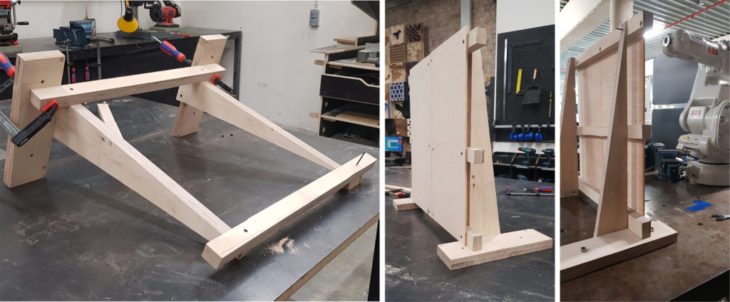
The first task was to design an end effector, which is what puts together the can with the robot as well as the presser to the servo. The first approach to this process was to design the pressing element. We decided to use The Power HD 1235MG servo for its adequate torque load.
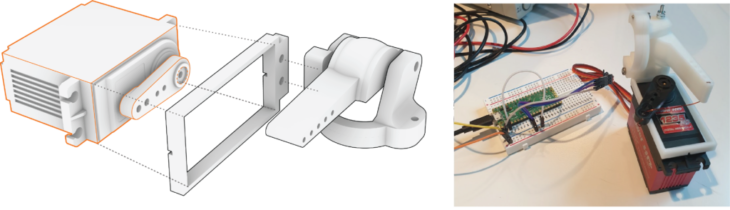
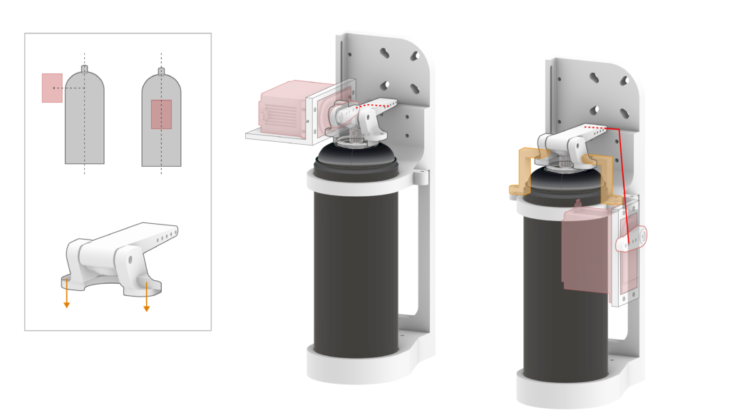
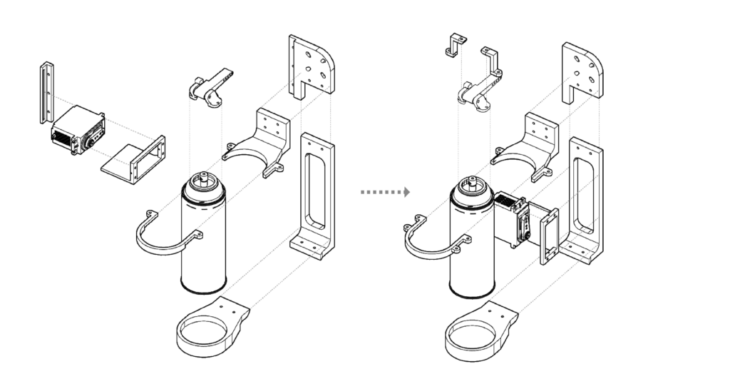
The first iteration of the full end effector was assembled for testing. During the assembly, we realized it had to be improved due to two problems: to centre the weight, to have the presser stay intact. Modifications were made before the next test installation on the robotic arm.

assembly of first prototype to modified prototype
The Electronics
The mechanism of spraying is broken down to 2 parts: moving the can and pressing the spray. The grasshopper script is responsible for moving the spray, while the pico and wiring are responsible for pressing the spray (red portion of the diagram).

This portion of the project has to go through series of debugging until the final installation to the ABB robot. The first step of debugging begins adding buttons, where we first ensure that each button will return a boolean value upon pressing. The second portion includes the servo to be connected, and ensures that it responds to the buttons. The third debugging involves the optocoupler, where the digital output is signalled manually through the robot controller (replacing the buttons) to the optocoupler. The optocoupler, if circuited and coded correctly, will send the signal to the servo.
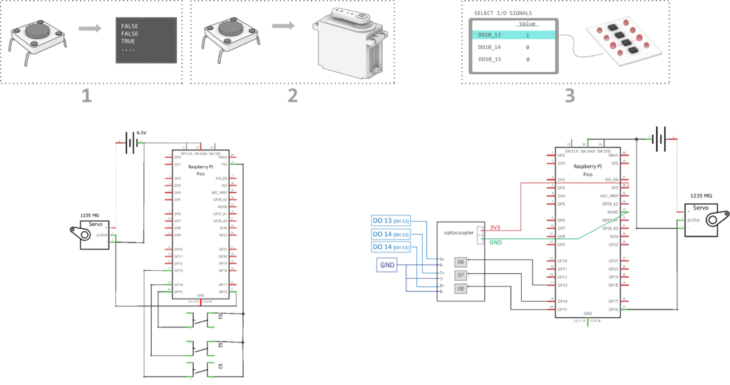
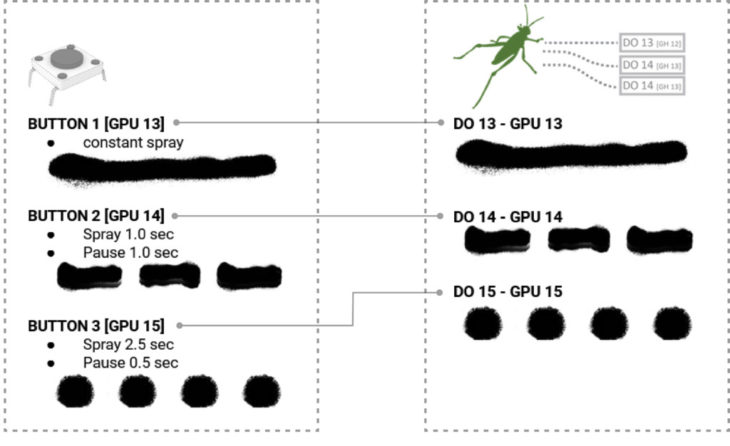
The buttons were coded to output three different types of spray patterns, which would be directly translated to the optocoupler as different digital outputs. Ultimately, ‘button 1 boolean value == True’ would be the equivalent of ‘DigitalOutput 13 == 1’. The grasshopper script would decide what digitaloutput (thus spray pattern) to use on which targets.
Robotic Simulation + Spray Parameters
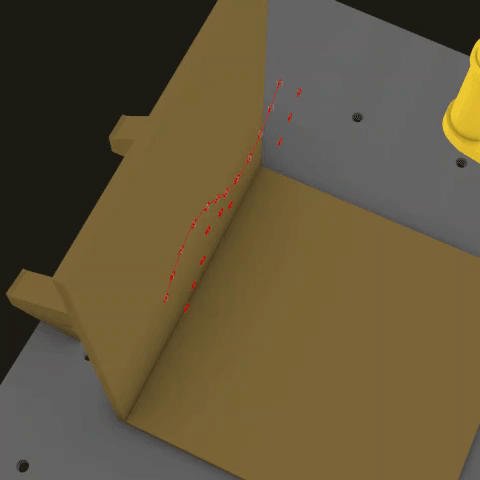
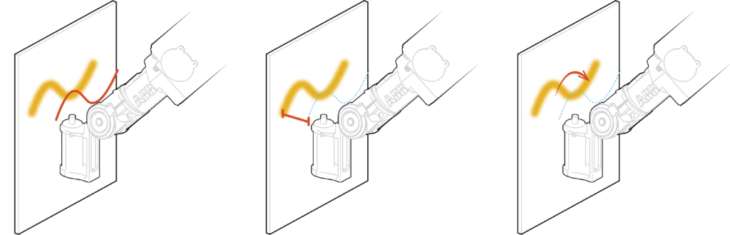
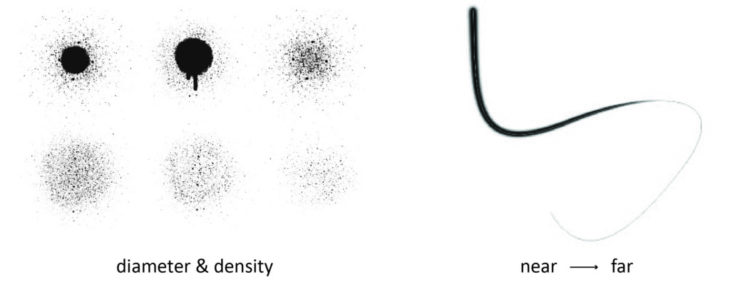
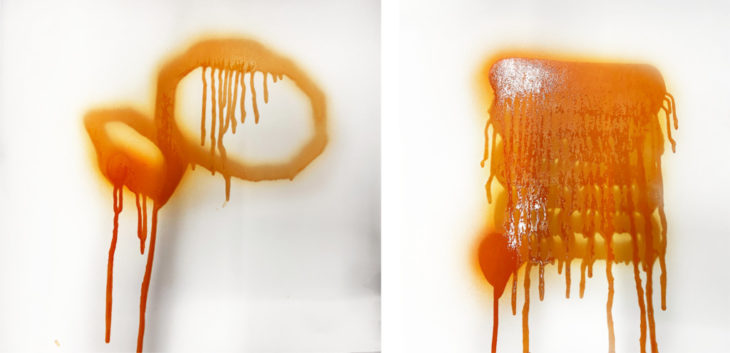
We developed different grasshopper scripts, beginning basic iterations of curves. Parameters are added within these curves to iterate varying distances and different speeds. These parameters can be further explored and added to the script, constructing a library of stroke thicknesses.

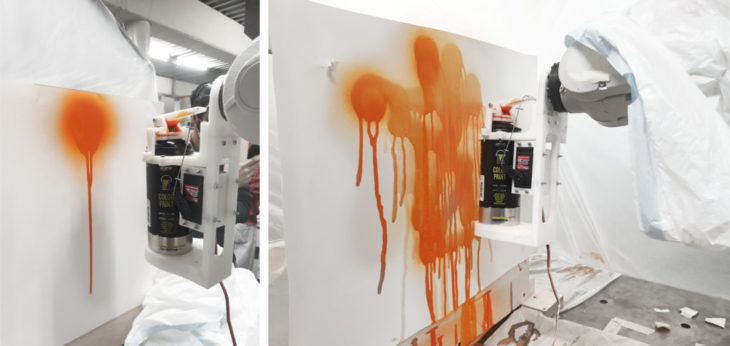
Installation + Spray Testing
The final installation included constructing the frame for the canvas as well as anticipating scenarios for safety measures. This included covering the robots with plastic, and ensuring the spray does not remain pressed when stopping the operation.
We executed two grasshopper scripts that were designed for spray tests. A dry run was performed to ensure no collision. The first two spray tests returned to us that the speed parameter had to increase from an average of 100mm/sec to 150mm/sec. The installation revealed changes that need to be made in speed and distance parameters, as well as new potential parameters (such as angular movements) that could be tested.
Credits
Aspiring Graffiti Artist // H.1 Studio is a project of IAAC, Institute for Advanced Architecture of Catalonia developed at the Master in Robotics and Advanced Construction in 2021/22 by:
Students: Yeo Jeong Kim, Robert Michael Blackburn, Jordi Vilanova, Abanoub Nagy Abdou Mikhail
Faculty: Angel Muñoz
Faculty Assistant: Shahar Abelson