Maximum and Minimum Values:
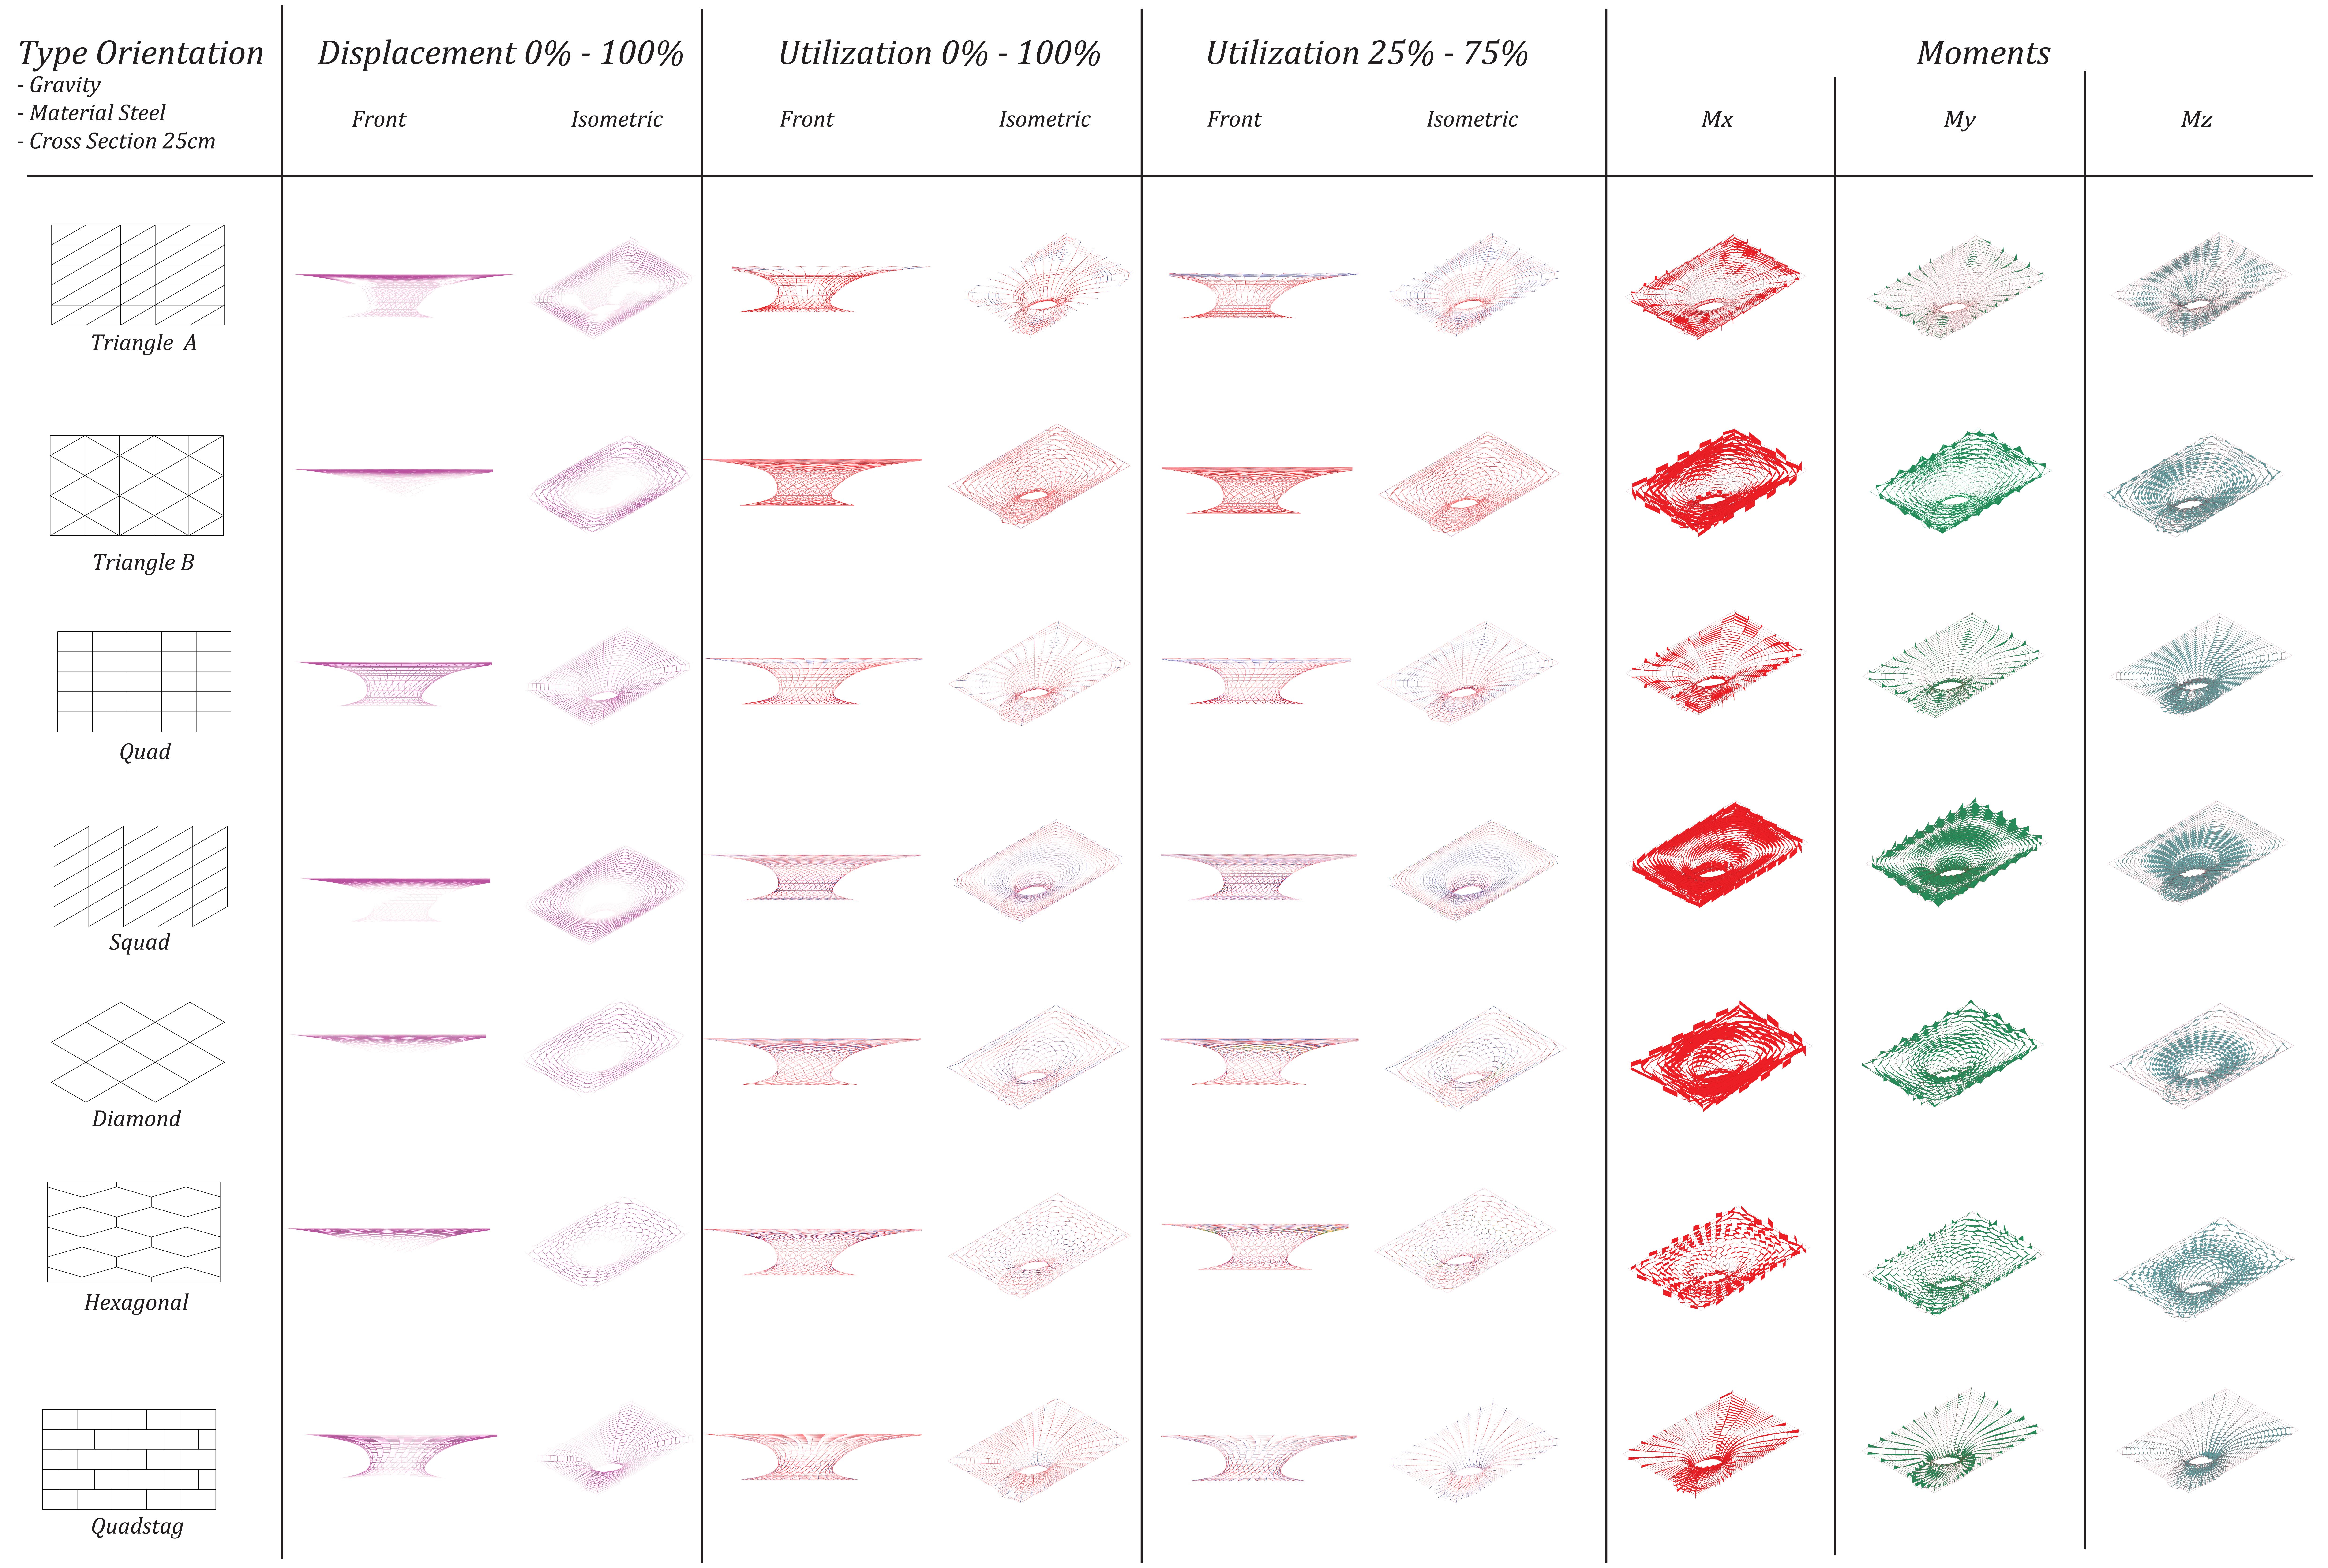
Type of subdivision/displacement(cm) (white to pink)/utilization 100 (red to blue)/utilization 25 75 (red to blue) triangular A/-2.97e-04 to 2.97e+04/-341448% to 322528%/-172849% to 155581% diamondond/-3.27e-03 to 3.27e+05/-471273% to 487941%/-236031% to 255086% quads/-2.00e-04 to 2.00e+04/-216497% to 220479%/-105539% to 110608% Squads/-7.71e-03 to 7.71e+05/-985081% to 963943%/-494696% to 488547% triangular B/-1.80e-03 to 1.80e+05/-427035% to 565655%/-178818% to 322524% hexagonal/-1.38e-03 to 1.38e+05/-290143% to 305622%/-141175% to 159706% quadstag/-3.82e-03 to 3.82e+05/-854700% to 854402%/-437472% to 418088%  Analysis: A previous analysis that can be made of the structure, since it is anchored all along the bottom and the top edges, is that those edges are one of the strongest part
 of the structure along with the smaller ring upon the anchored base. Since this ring is in a more vertical position, functioning as a cylinder, and has more subdivisions than the rest of the structure, there are more ways and connections for the loads applied to the structure to find their shortest path. On the other hand, the most planar ring at the top is one of the weakest points, since it is more planar and with bigger beams, making a long and inefficient path of the loads in those areas. Observing separately the analysis, the displacement of some types of subdivision are better than others, showing the lower ring of the structure with almost the lowest values of displacement and other with a slightly increase at the values along with the longest side of the lower ellipse ring. Triangular B, Diamond and Hexagonal were the types of subdivision with the best results for the displacement due to the more diagonal orientation of the beams, so there are no perpendicular or longitudinal beams to be differently stressed, but a net of diagonal ones, functioning as a network. The analysis of the utilization of the structure of the total highest values (tension) and the total lowest values (compression) didn’t showed much difference, so the range of values was decreased in 25% to 75% to be more clear. Those diagrams show similarities on the behavior of the structure at the values of the utilization. Usually they present the same behavior of two tension (blue) rings, intercalated with three compression (red) rings of utilization and two white rings, showing a balance of compression and tension. Depending on the type of subdivision those rings vary in size and in position, but remain almost the same. The biggest difference at these behavior was at the structure with the the triangulation B pattern, which showed almost a compression behavior. These can be explained by the overall shape of the subdivision, which is one based on equilateral triangles, which is the strongest way of having a single surface, since a surface is defined by three points, or one point and a line. Due to the diagonal orientation of some types of subdivisions, the Moments on the X axis are bigger, at the Triangulation B, Squad, Diamond, and Hexagonal, since the beams are carrying the loads in a diagonal. It is also visible that at the more orthogonal types of division, the structure Moments Y is basically radial to the center. And at the edges of surface. The Z Moment occurs mainly at the planar central ring of the structure, since it don’t have height for distributing easily the weight
 of the structure. If at a moment the structure suffers an overload, in all of the options, would be at this area that the structure would collapse. Conclusion: The best type of subdivision of surface for this shape is the Triangular B, since it is best distributing equally along the beams the load of the structure all, making the structure work as a net.
