For this project I want to develop a laser projector using rotating mirrors.
References
Here is a nice example:
http://www.youtube.com/watch?v=w5KdqRwMd1s
And this is another good example.
Concept
- A few mirrors are mounted vertically on a spinning disc.
- A laser is pointed on the mirrors. The mirrors reflect the light.
- The mirrors are all have a slightly different inclination.
- When the laser shines light continuously, then each mirror will reflect the light at a slightly different height on the wall. For example: 8 mirrors = 8 lines.
That’s how to draw parallel lines. If we have 6 mirrors and the laser is on continuously, then we get this pattern: mirror 1: on —— mirror 2: on —— mirror 3: on —— mirror 4: on —— mirror 5: on —— mirror 6: on —— To draw patterns or text the trick is to turn the laser on and off at the right moment. For example, to have only two lines in the middle, we would need to do this: mirror 1: off mirror 2: off mirror 3: on —— mirror 4: on —— mirror 5: off mirror 6: off Controlling the speed of the disc with the mirrors is crucial for this. I’m thinking of using the solution from the video: the disc is white, and one spot has a black marker. An optical sensor detects when the black marker passes in front of it, and like this it’s possible to find out how many rounds per minute the disc is doing. This is a first shot the algorithm in pseudocode: numMirrors = 8; mirrorWeWantToHit = 2; // let's say we want to hit mirror 2 timePerMirror = discSpeed / numMirrors; timeDiff = difference between now and markerLastSeenTime if(timeDiff > mirrorWeWantToHit * timePerMirror && timeDiff > (mirrorWeWantToHit + 1) * timePerMirror){ switch laser on } else { switch laser off } At a later point I will also need to define a font map if I want to display text. However, all the examples I saw were using text, and I think it might be interesting to work with more abstract shapes, such as waves and blocks.
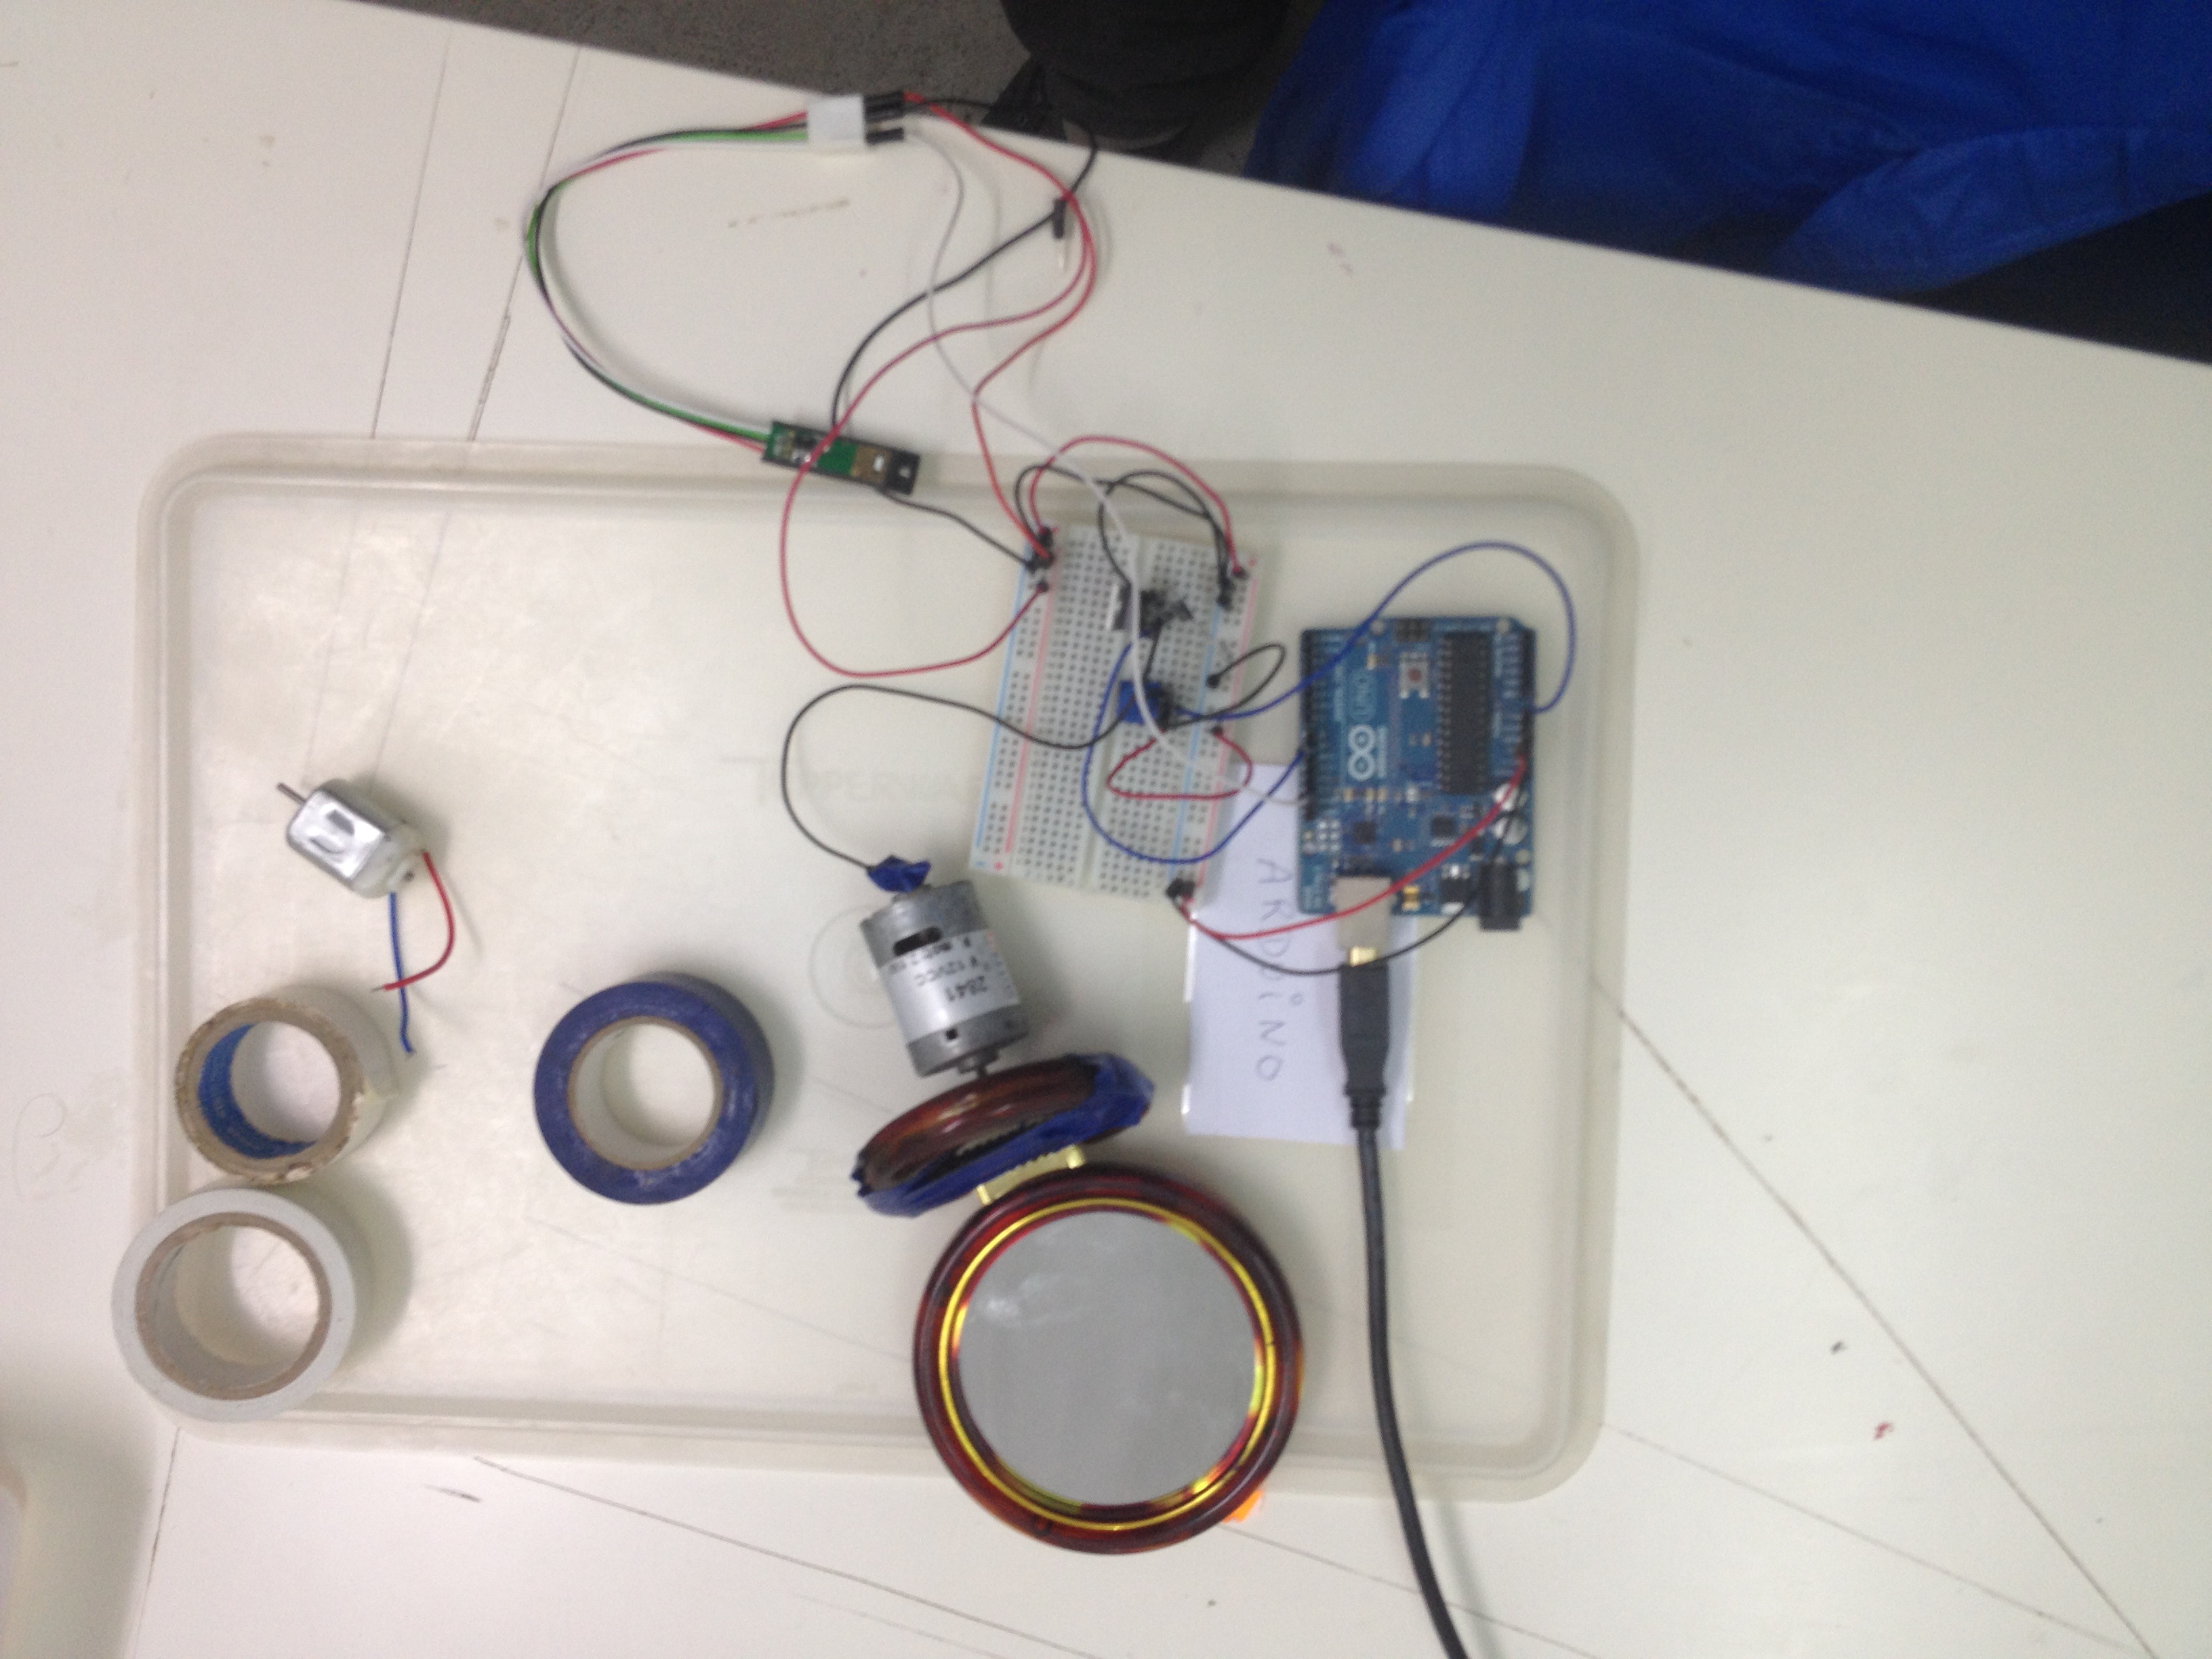
Bill of materials
- 1 x Laser Module – Red with TTL Control. It bought this from SparkFun a while ago, but never used it. I’m not sure why this costs $18.95. Most examples I saw use cheap laserpointers.
- 1 x Optical Detector / Phototransistor – QRD1114 ($1.13). The range of this thing is 0.50 – 1 cm, so it seems like a good idea to use this.
- 2 resistors for the phototransistor, one 200-200ohm and one 4.7k – 5.6k ohm
- A motor. I have one of these standard toy motors that came with my Arduino starter kit, but I’m pretty sure these are not powerful enough. I found a bigger, 12V (2.1W) motor laying around here.
- An IRF520 MOSFET transistor, for switching high current for the motor.
- A diode, also for the motor.
- A pot resistor is nice for testing so you can control the speed of the motor easily. But it is not required.
- An Arduino. I used an Uno.
- An external power supply.
- A mirror. I started off with a one I found in a cheap shop (€ 1.50).
- Something to put the mirrors on. I’ll look for something simple to begin with, but it could be nice to have a Processing sketch that creates a 3D object I could print with the Makerbot. I could then easily make different versions of the object, for example one with more mirrors.
First steps
At this point I know enough about electronics to know that motors need power, but I’m a little unsure if I should use a transistor or a relay. This tutorial seemed to suggest that a transistor is fine. I started off with building the circuit to control the motor, which was pretty easy by following the tutorial. Then I taped a mirror to the motor and connected the laser by following the guide from SparkFun. I did a quick test by pointing the laser the rotating mirror.