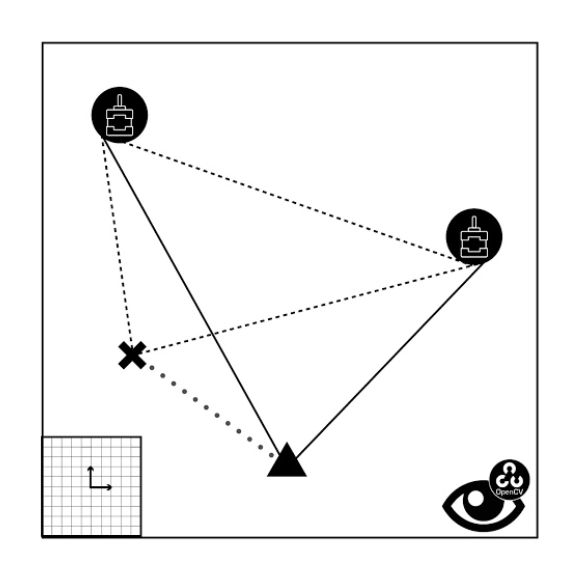
Why a Cable Robot?
In order to achieve our goals we had the need to choose a robot that was simple enough, fast to build, cheap and light. And a two axis cable robot was the best option.
- Fast
- Cheap
- Adaptable
- Easily fixable
- Easily Programmable

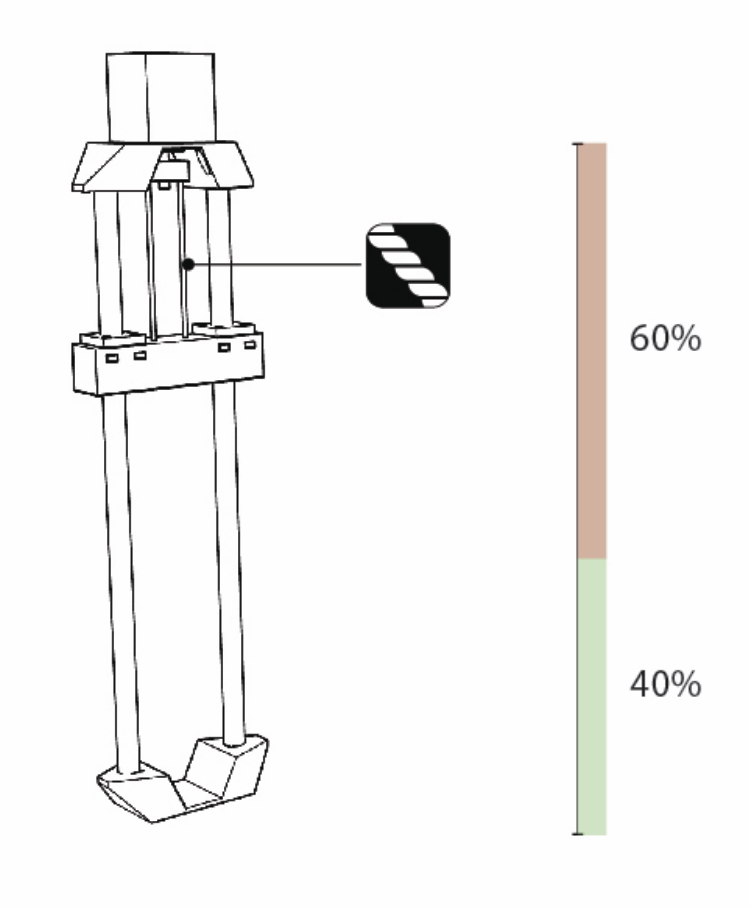
Mechanical System Iteration 1 – Twisted String Actuator
PROs
- High payload with a weaker motor
- Stronger frame
CONs
- Very limited range
- Loss of 60% of the length
- Low precision
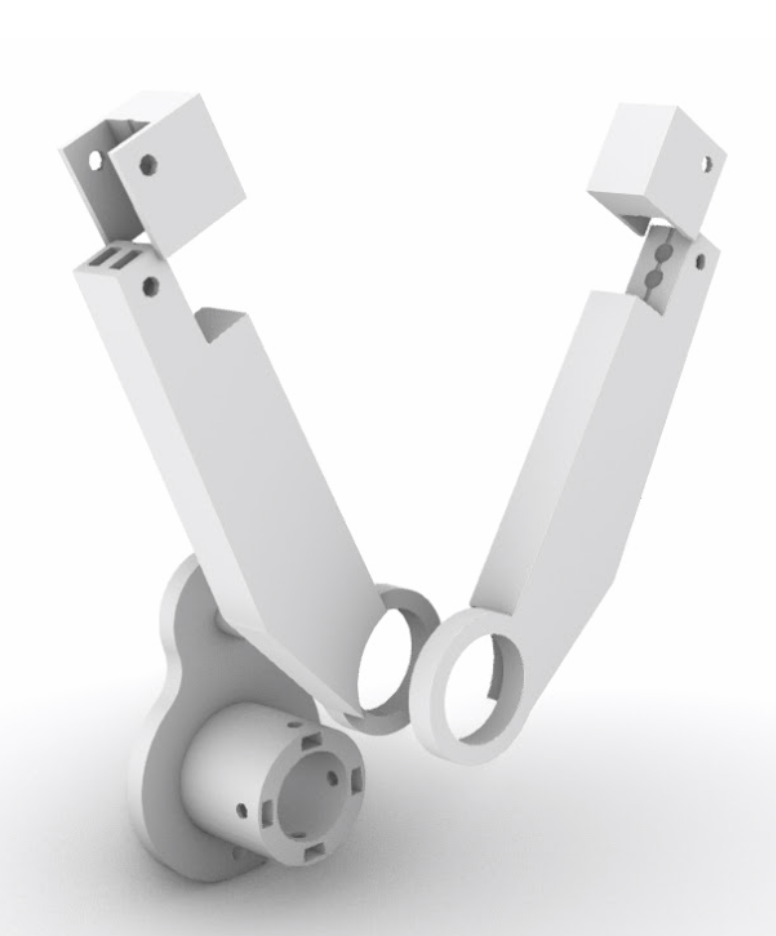
Mechanical System Iteration – Pulley System
PROs
- Better Precision
- Wide range of action
- Easy to mount
CONs
- Lower payload

C.R.A. 0.1
First Iteration was too light and the “arms” were unnecessarily long and didn’t let the bearings do their job in a proper way. Though, after adding some weight it allowed us to test it properly.
C.R.A. 0.2
Second iteration comes with shorter arms to leave more the cable more free to move, bigger to increase the weight and with a servo motor space. This model is derived from the first test and it just fix some issues we had.

Hardware Setup
The hardware set up is composed of four main components:
- RUMBA Board
- Two NEMA17 Motors
- Action Camera
- Computer

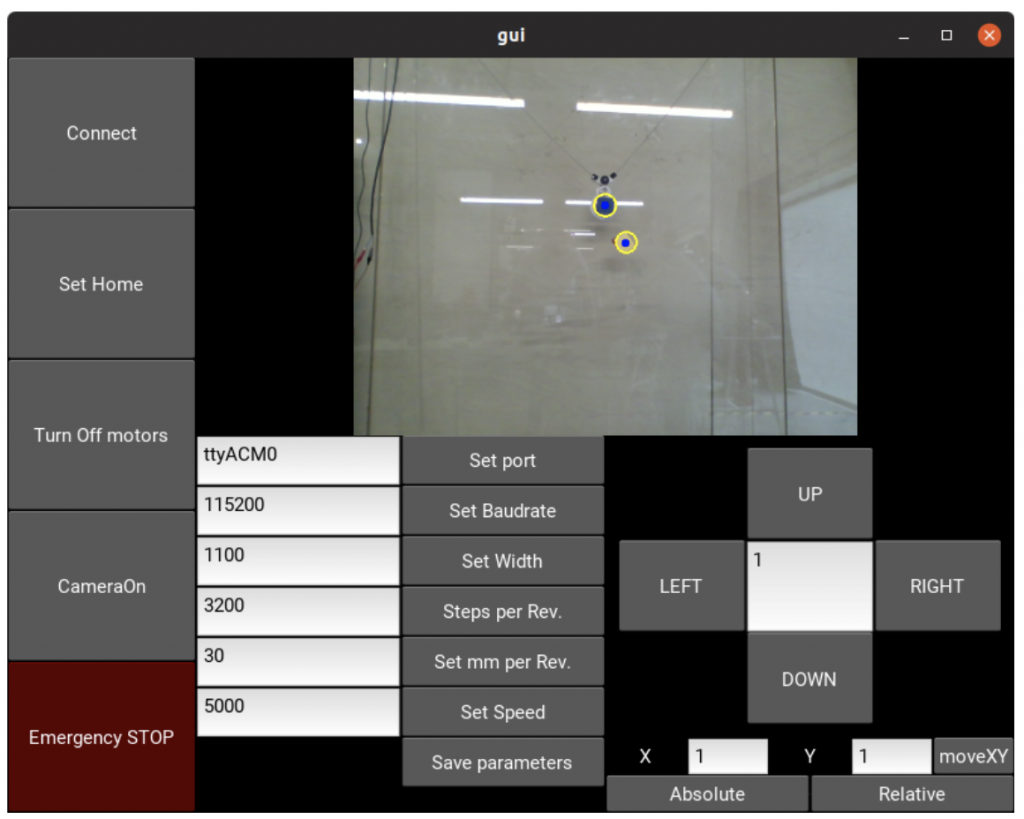
Custom UI + Computer Vision Implementation
We also built a User Interface with Computer Vision embedded which give us the possibility to move the robot without pressing any button thanks to the algorithm that maps the distance between the tool tip and the target.
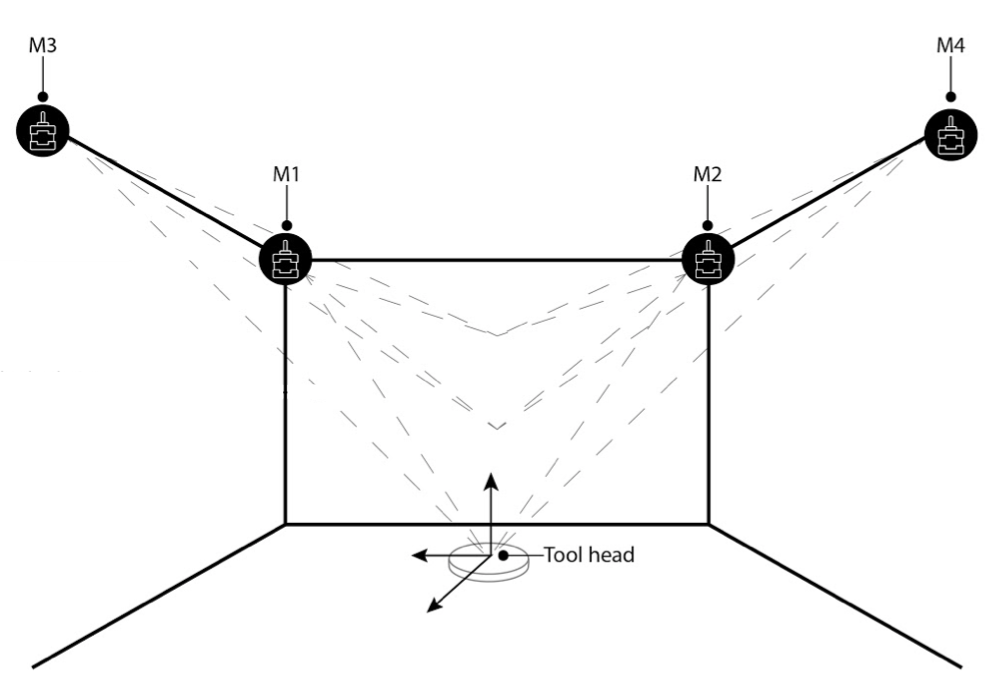
Future Steps
The final goal would be to achieve the same features on a 3D cable robot which can move in the space.
Students: Stefano Meloni, Riccardo Mura, Luis Arturo Pacheco Alcalà
Tutor: Angel Muñoz