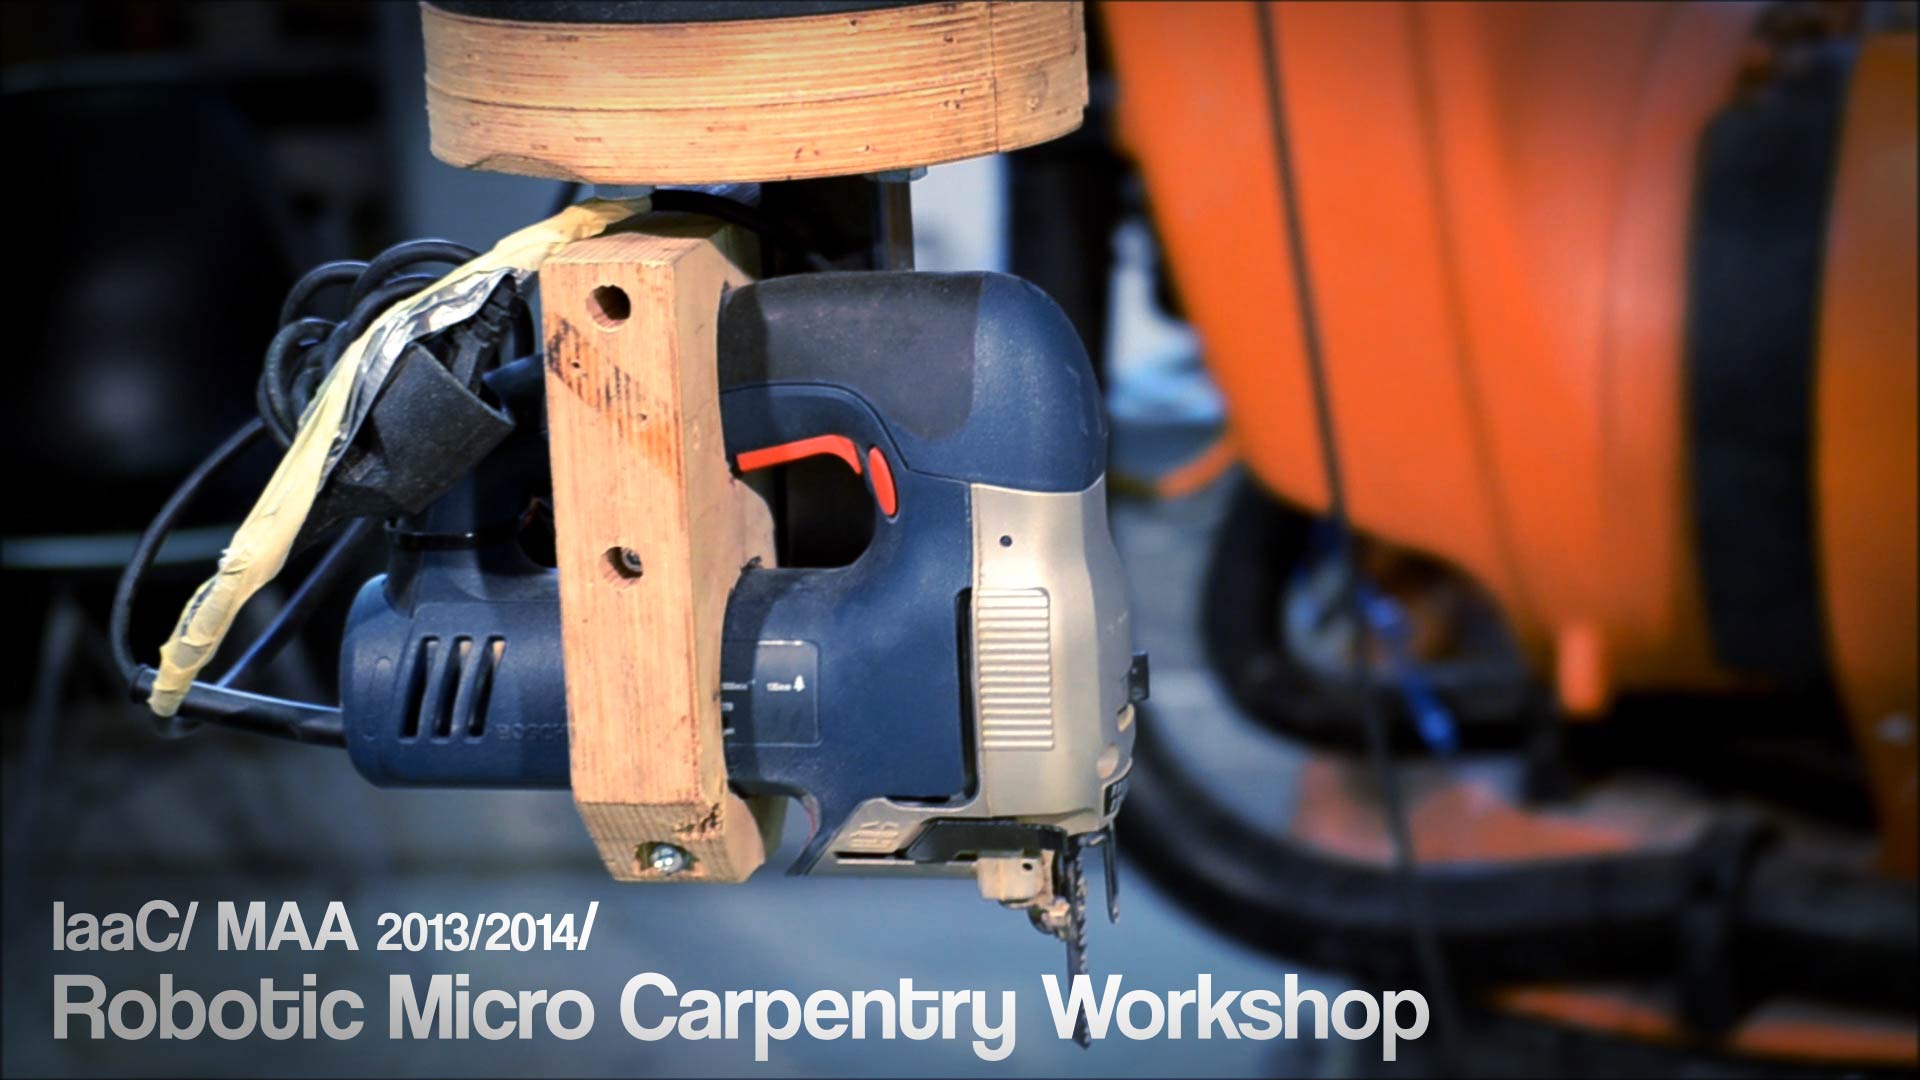
 For the development of the microcarpentery workshop, a class of 22 people was distributed in subgroups to fulfill the dream of building a minimal chair, using the powerful KUKA robotic arm and standard carpenter tools (sander, drilling, jigsaw, and planar). Each one of the different groups was assigned the task of taking care of one machine and one part of the chair. During five days we were learning how to set the KUKA features, playing with the console, and following carefully all the instructions given by Tom Pawlofsky, to figure out how to set all the coordinates the makes the KUKA follow the right traks to cut, drill, and sand the wood. The initial step was to set the tools, on a external support and make the robot recognize the position of its coordinate origins. After several hours setting up the tools, we had to produce an external device that would be attached to the arm, to hold the wooden piece (after being cut) to be sanded and drilled for notching with the other chair components.
 In the graphic below you can see the distribution of the back legs, for being cut with the jigsaw.
 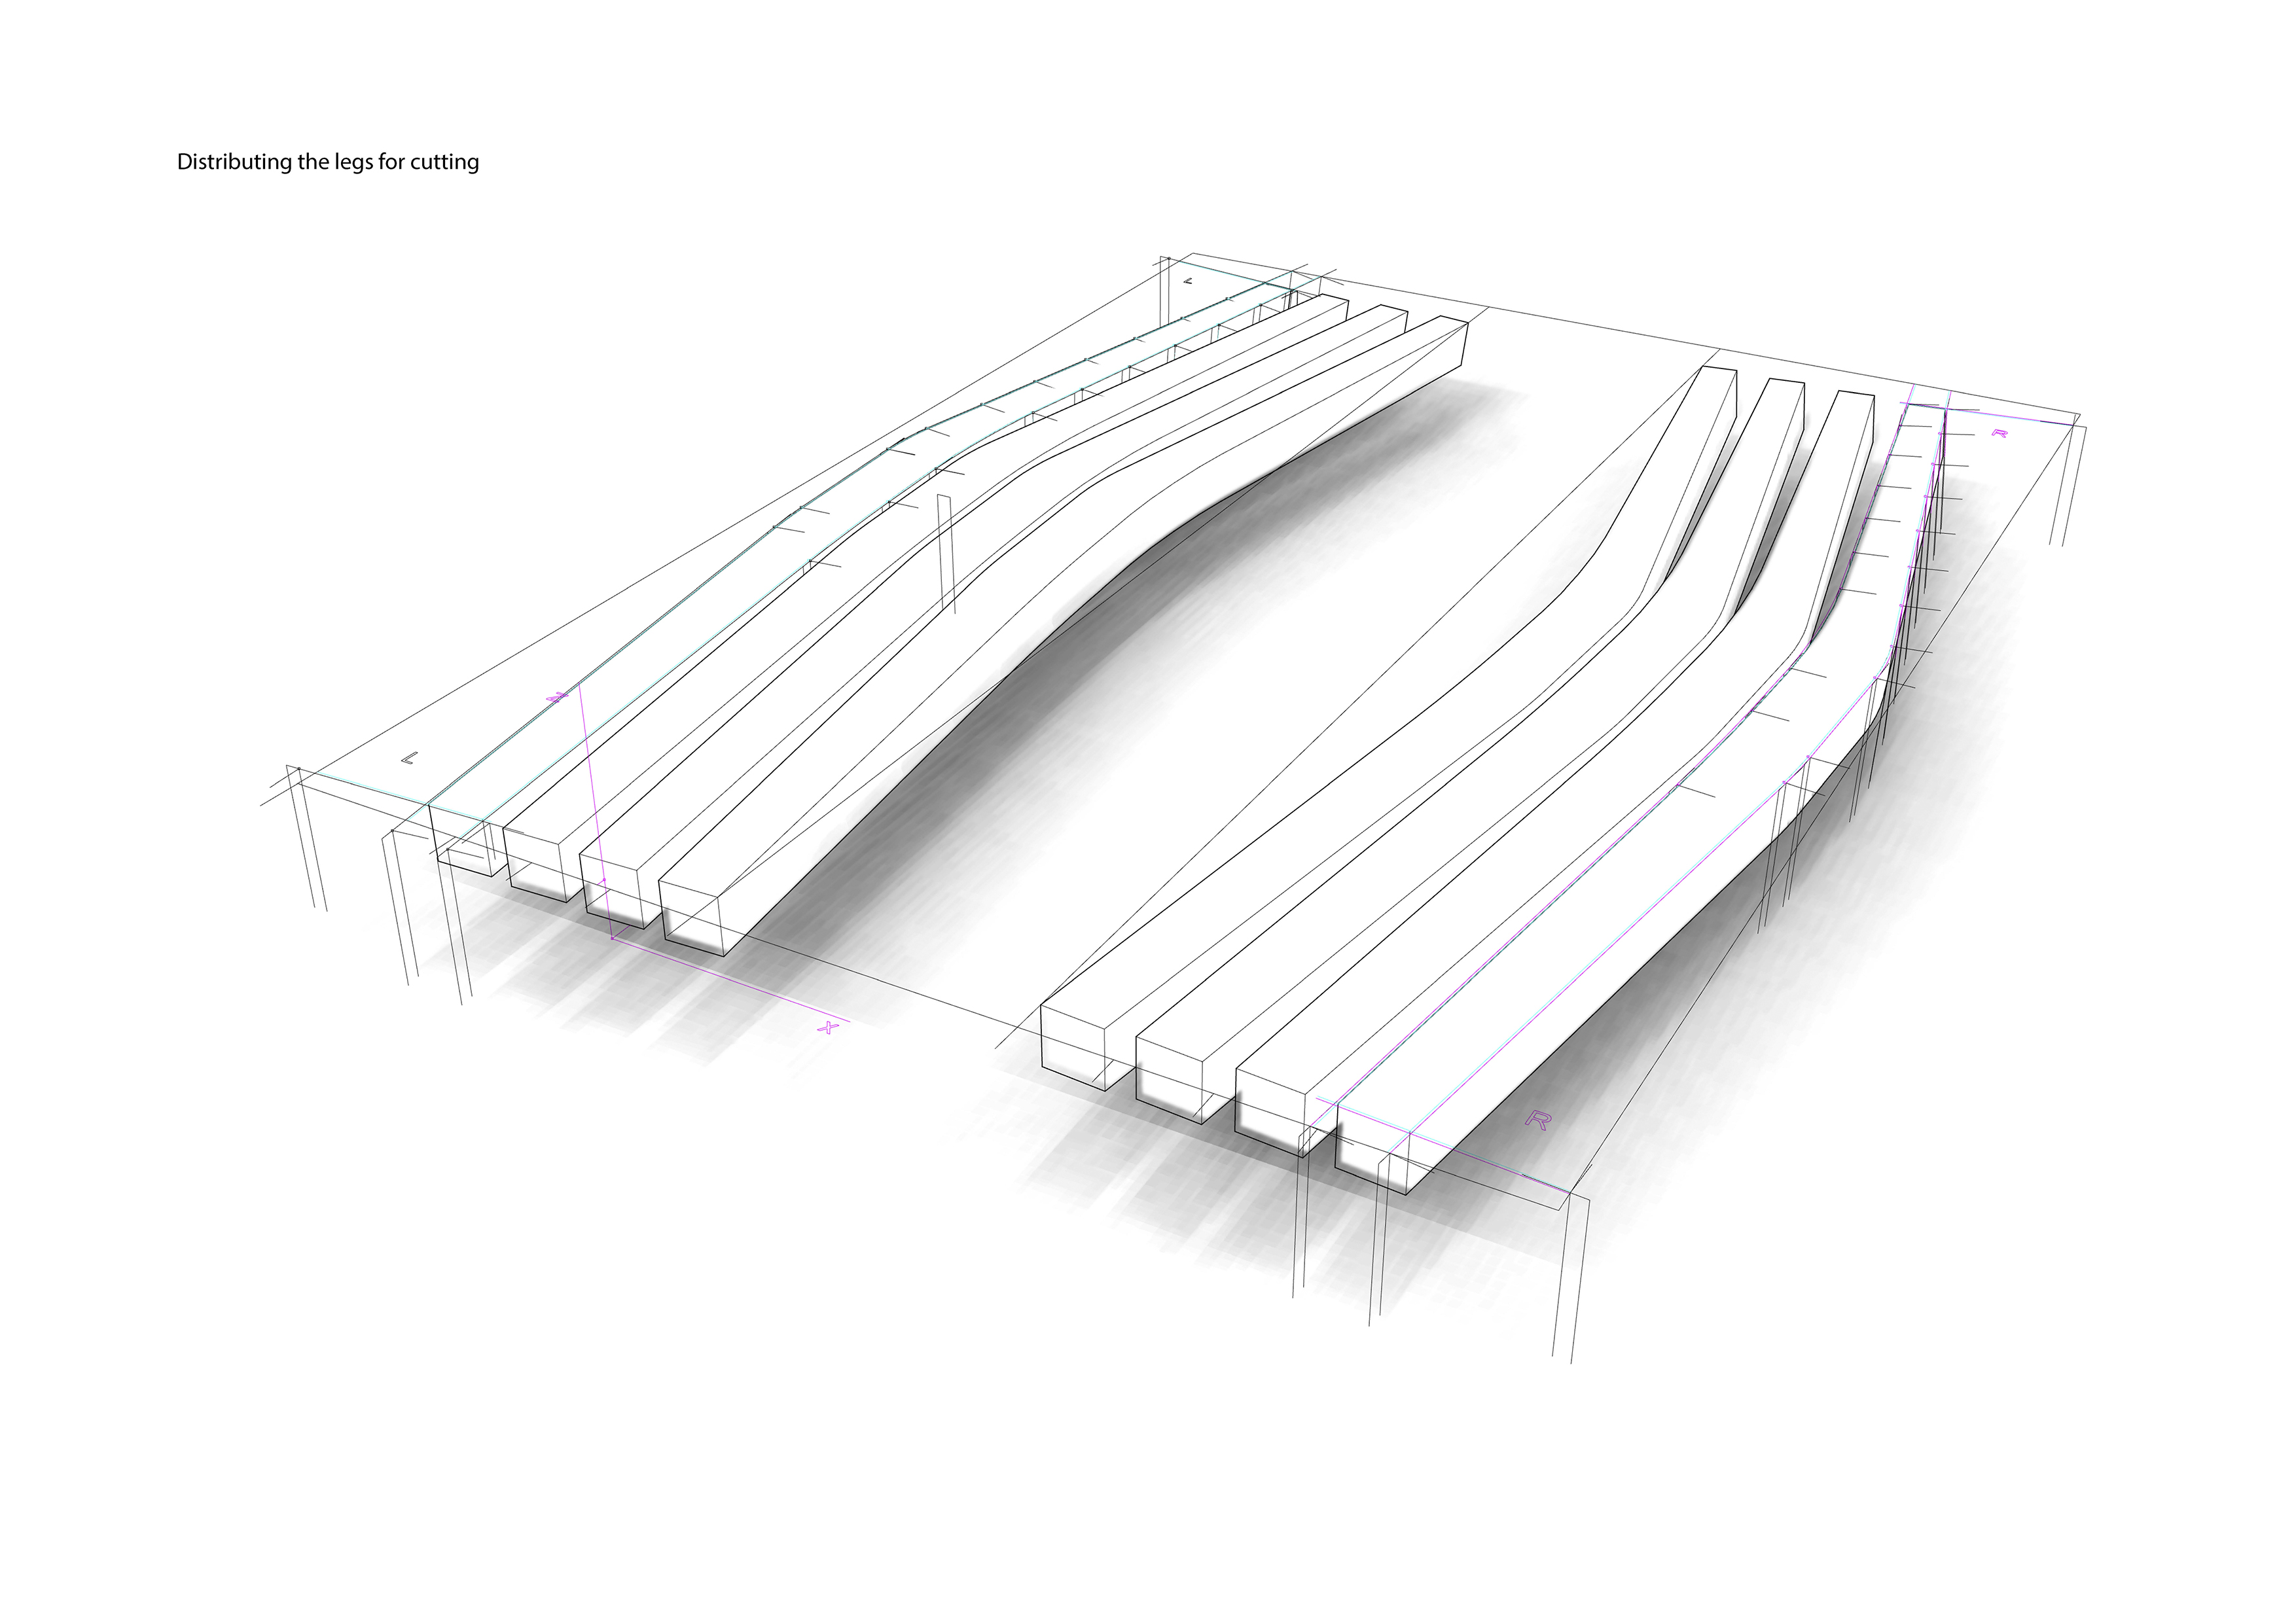 We were using Tom Pawlofsky software during the workshop. The main requirement was to set the path that KUKA had to follow, using rhino lines and arches, placing every five centimeters, the angles that the jigsaw needed to do the right cut. After that, Tom helped us to introduce the files and export the code with his software.
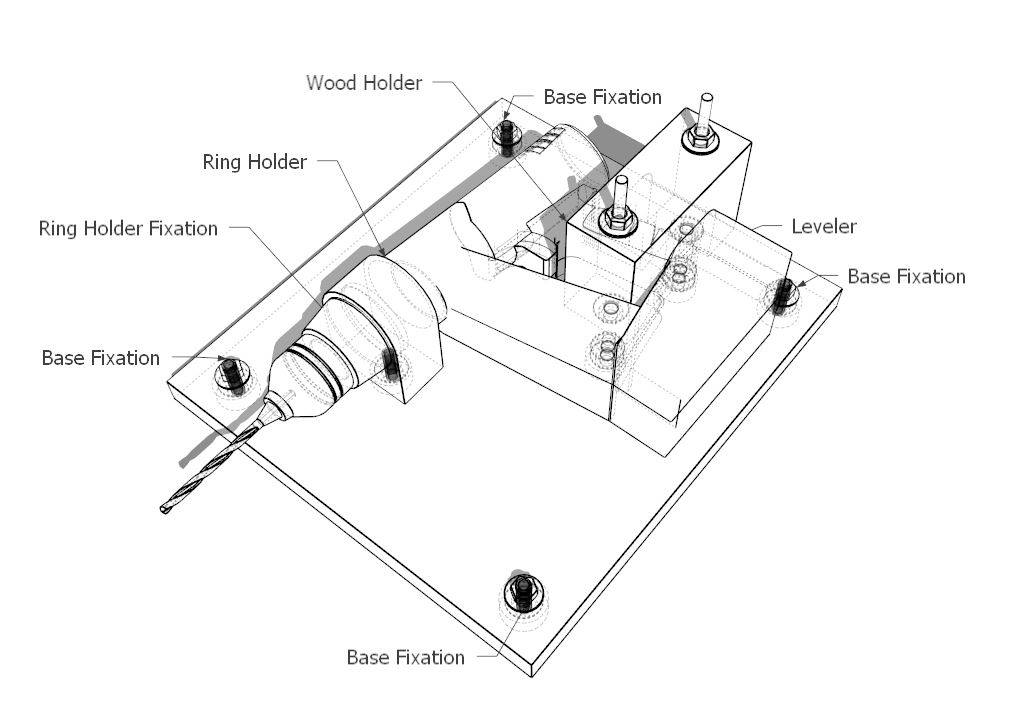
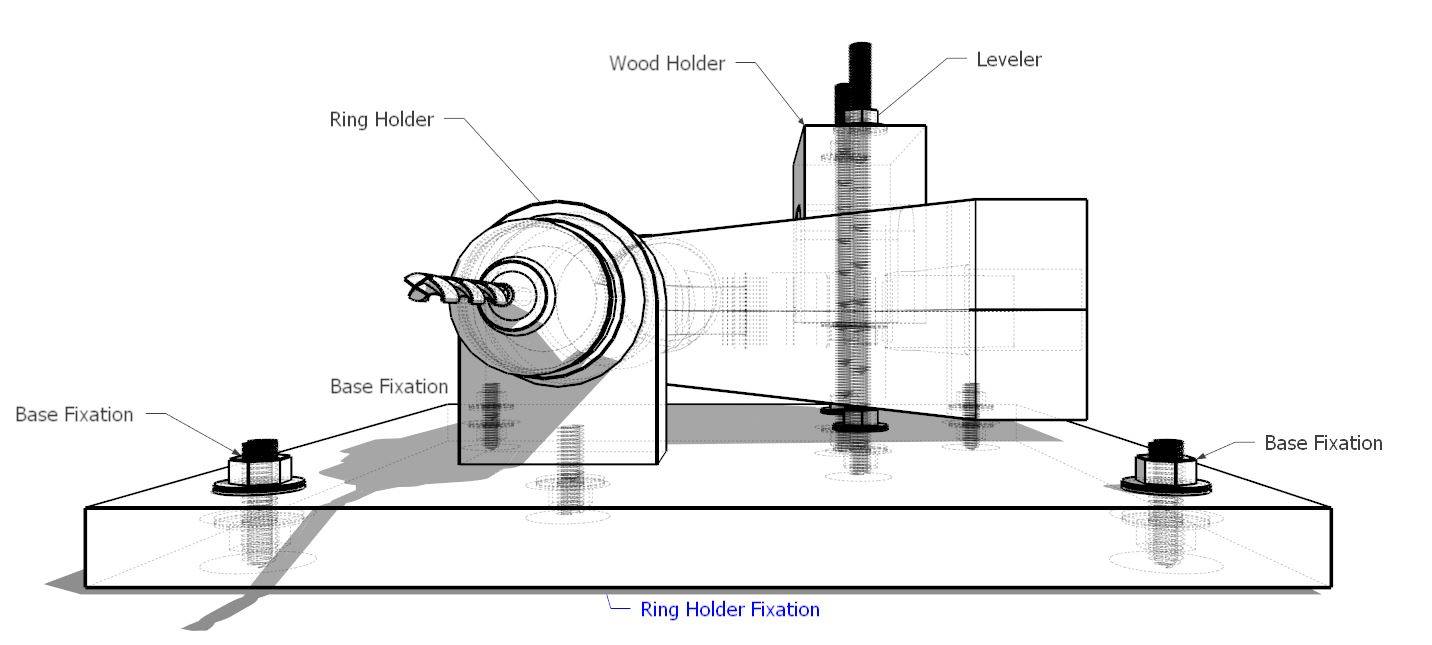
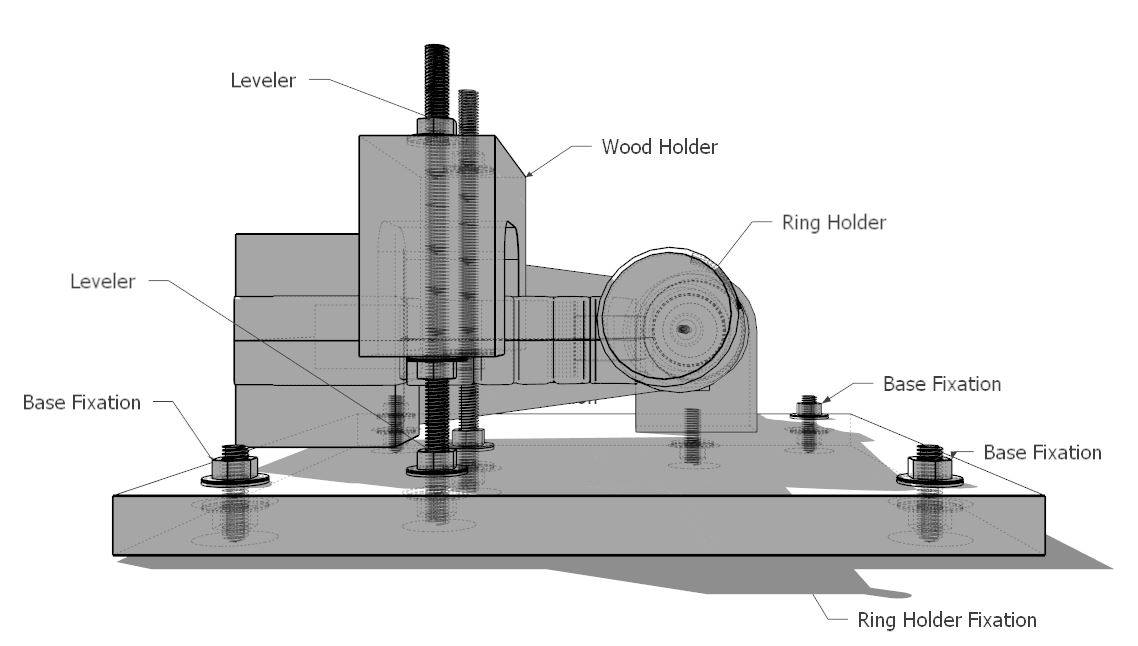
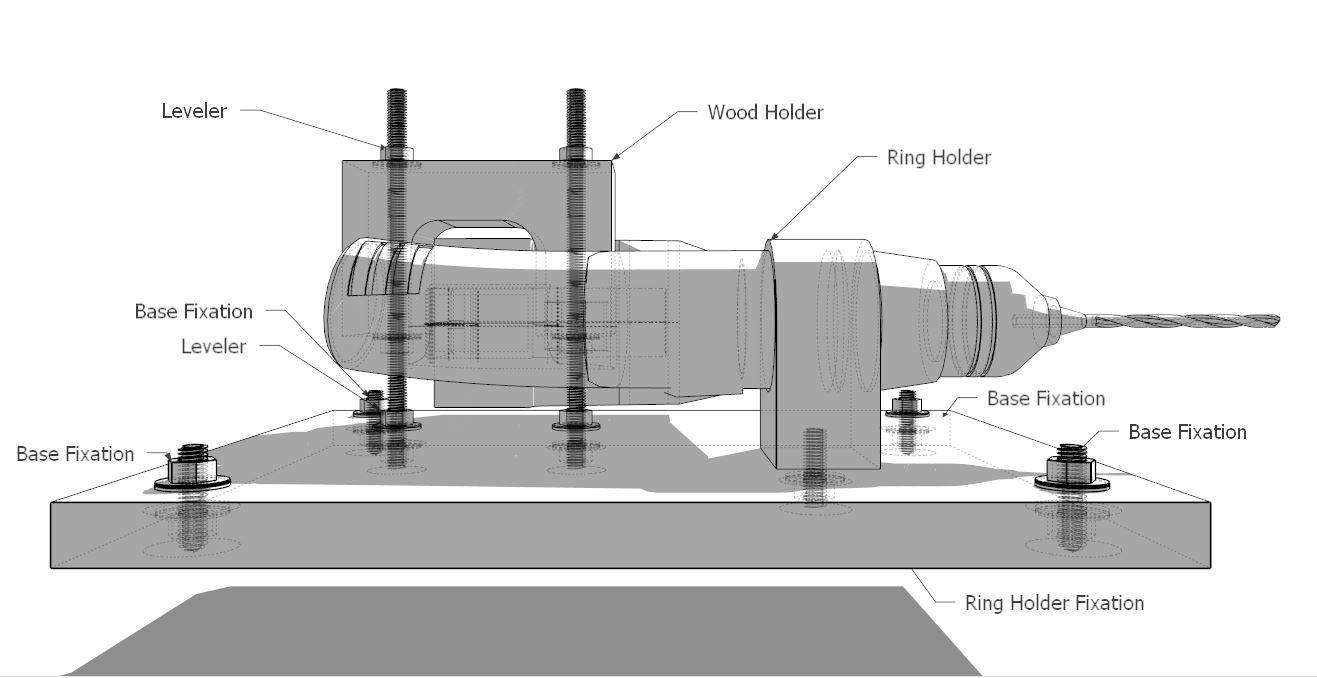
 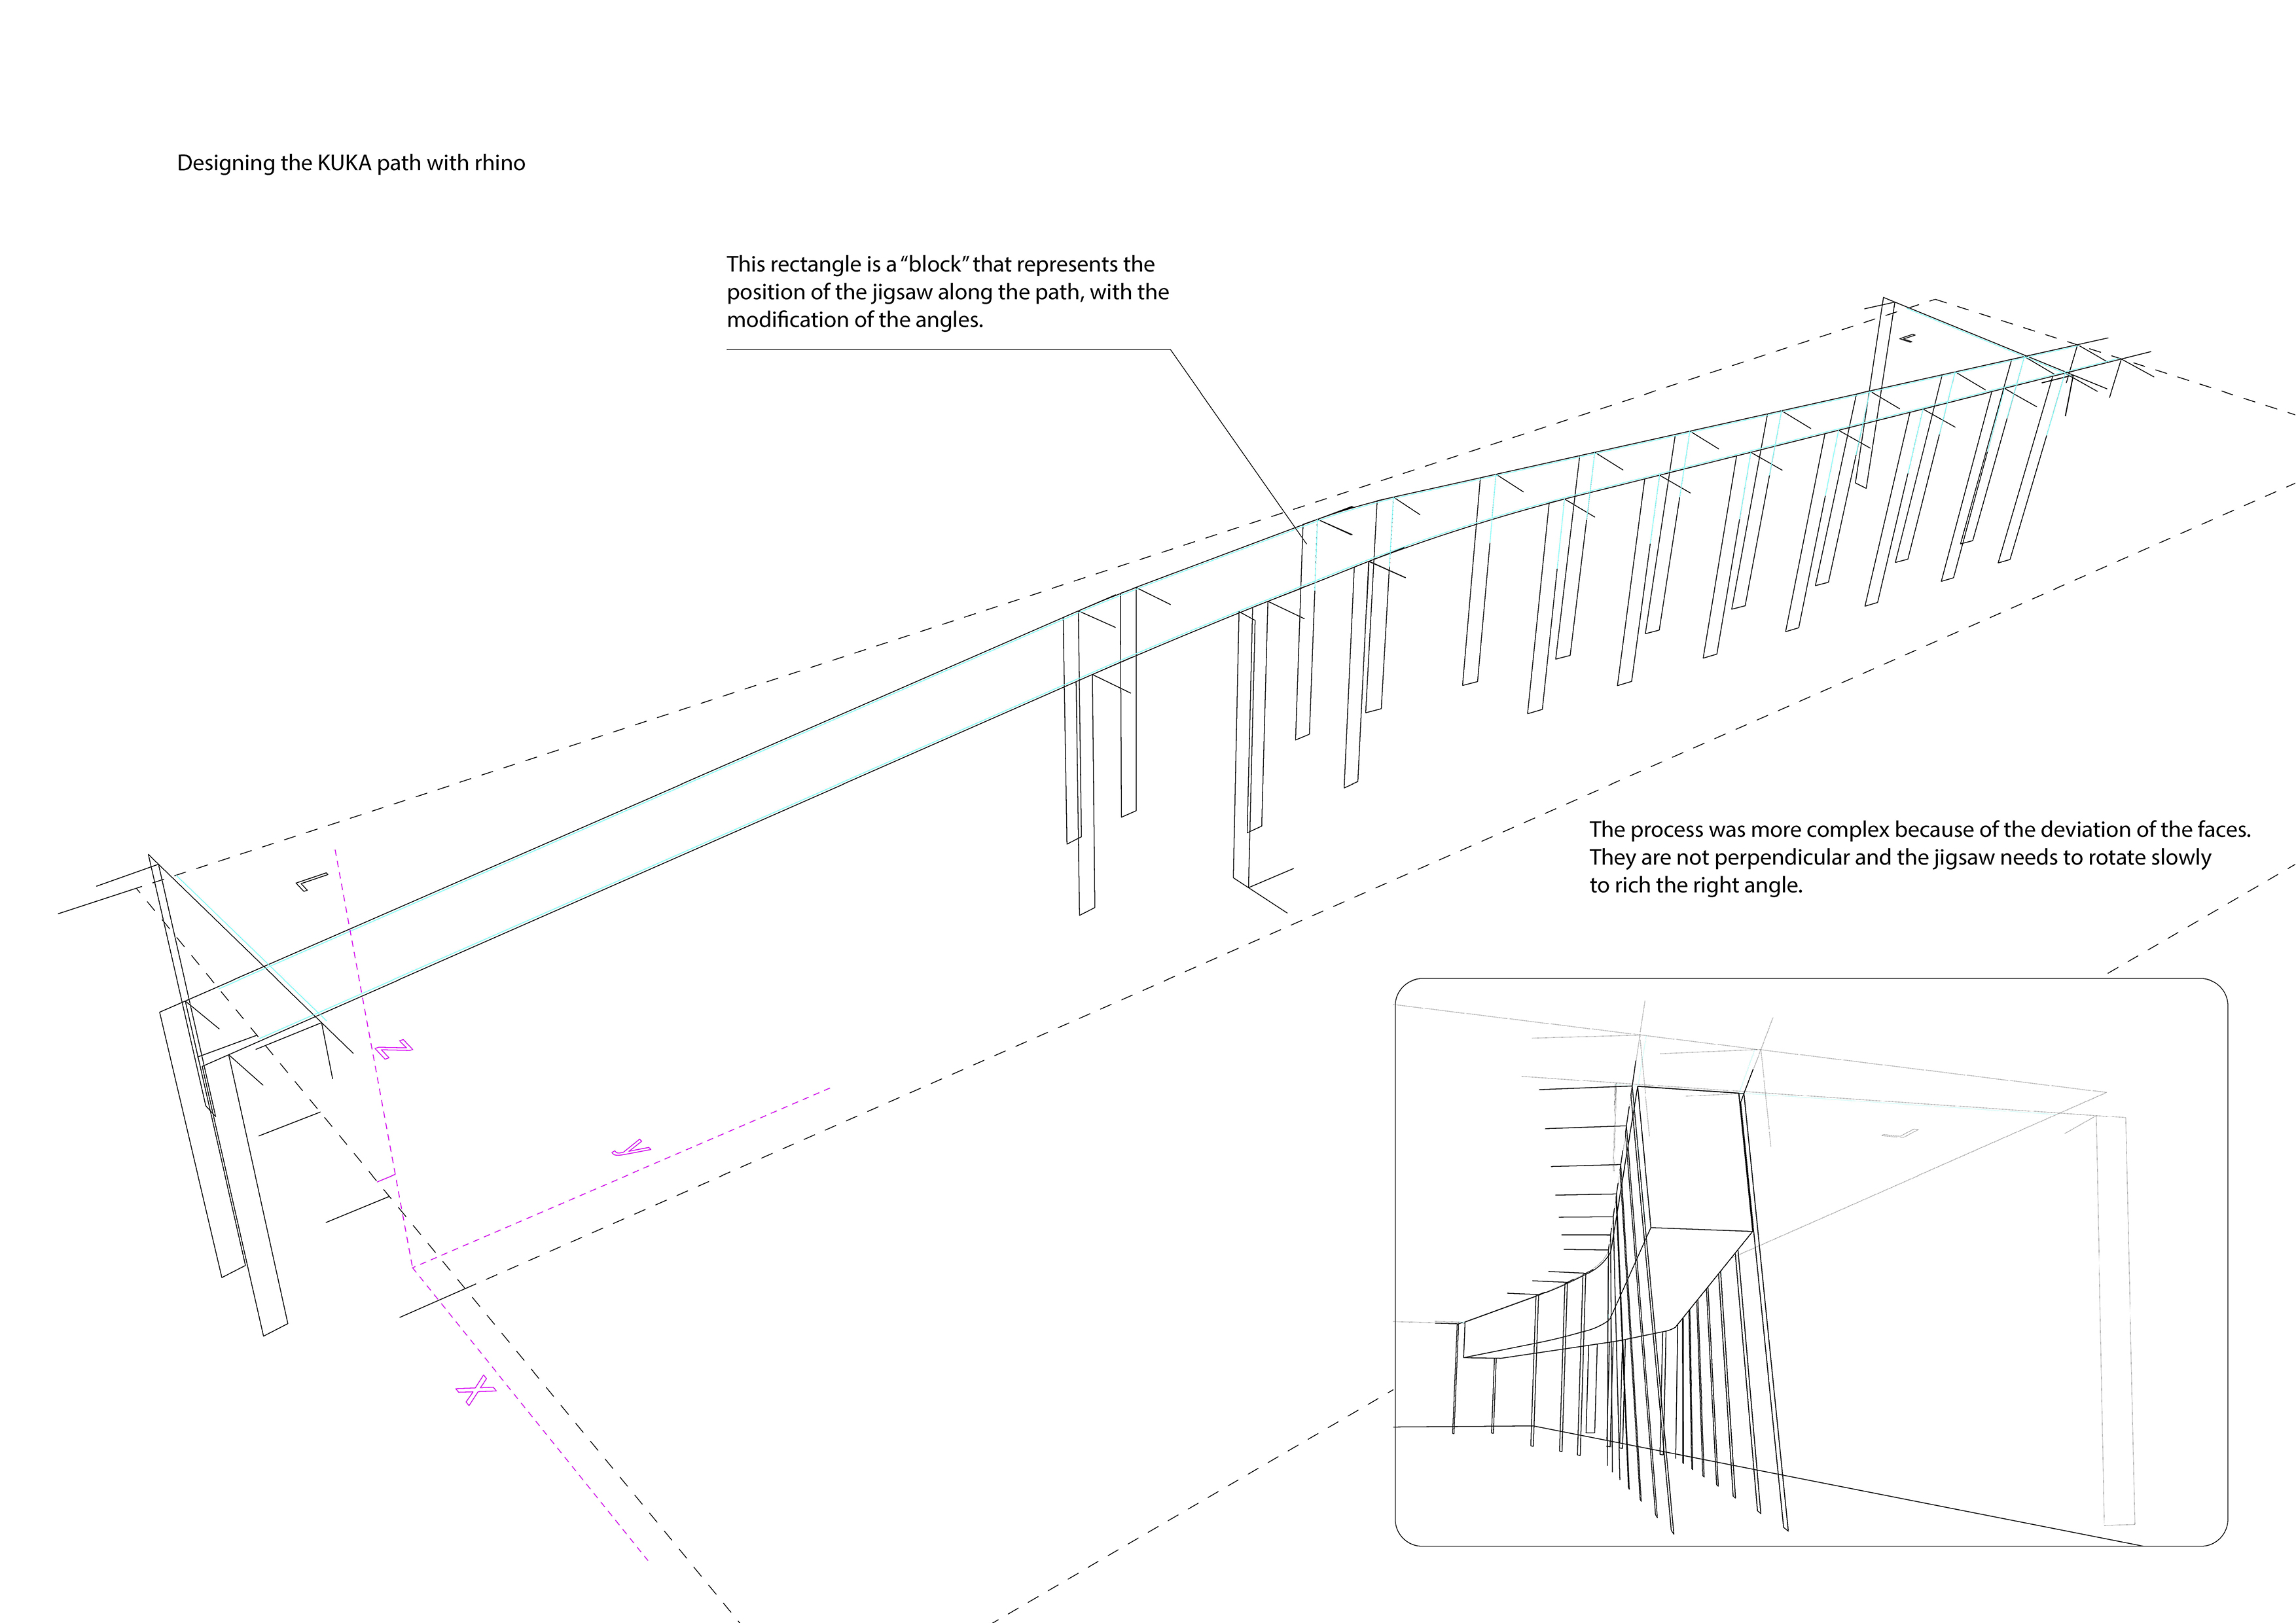 The last step after collecting the back leg pieces should have been to sand and drill the legs, so we decided to create a tool which could be able to hold two legs, and let us sand their front and back sides, just with a rotation of 180º of the tool. At the same time device allowed the drilling of the faces which required to have a hole for notching.
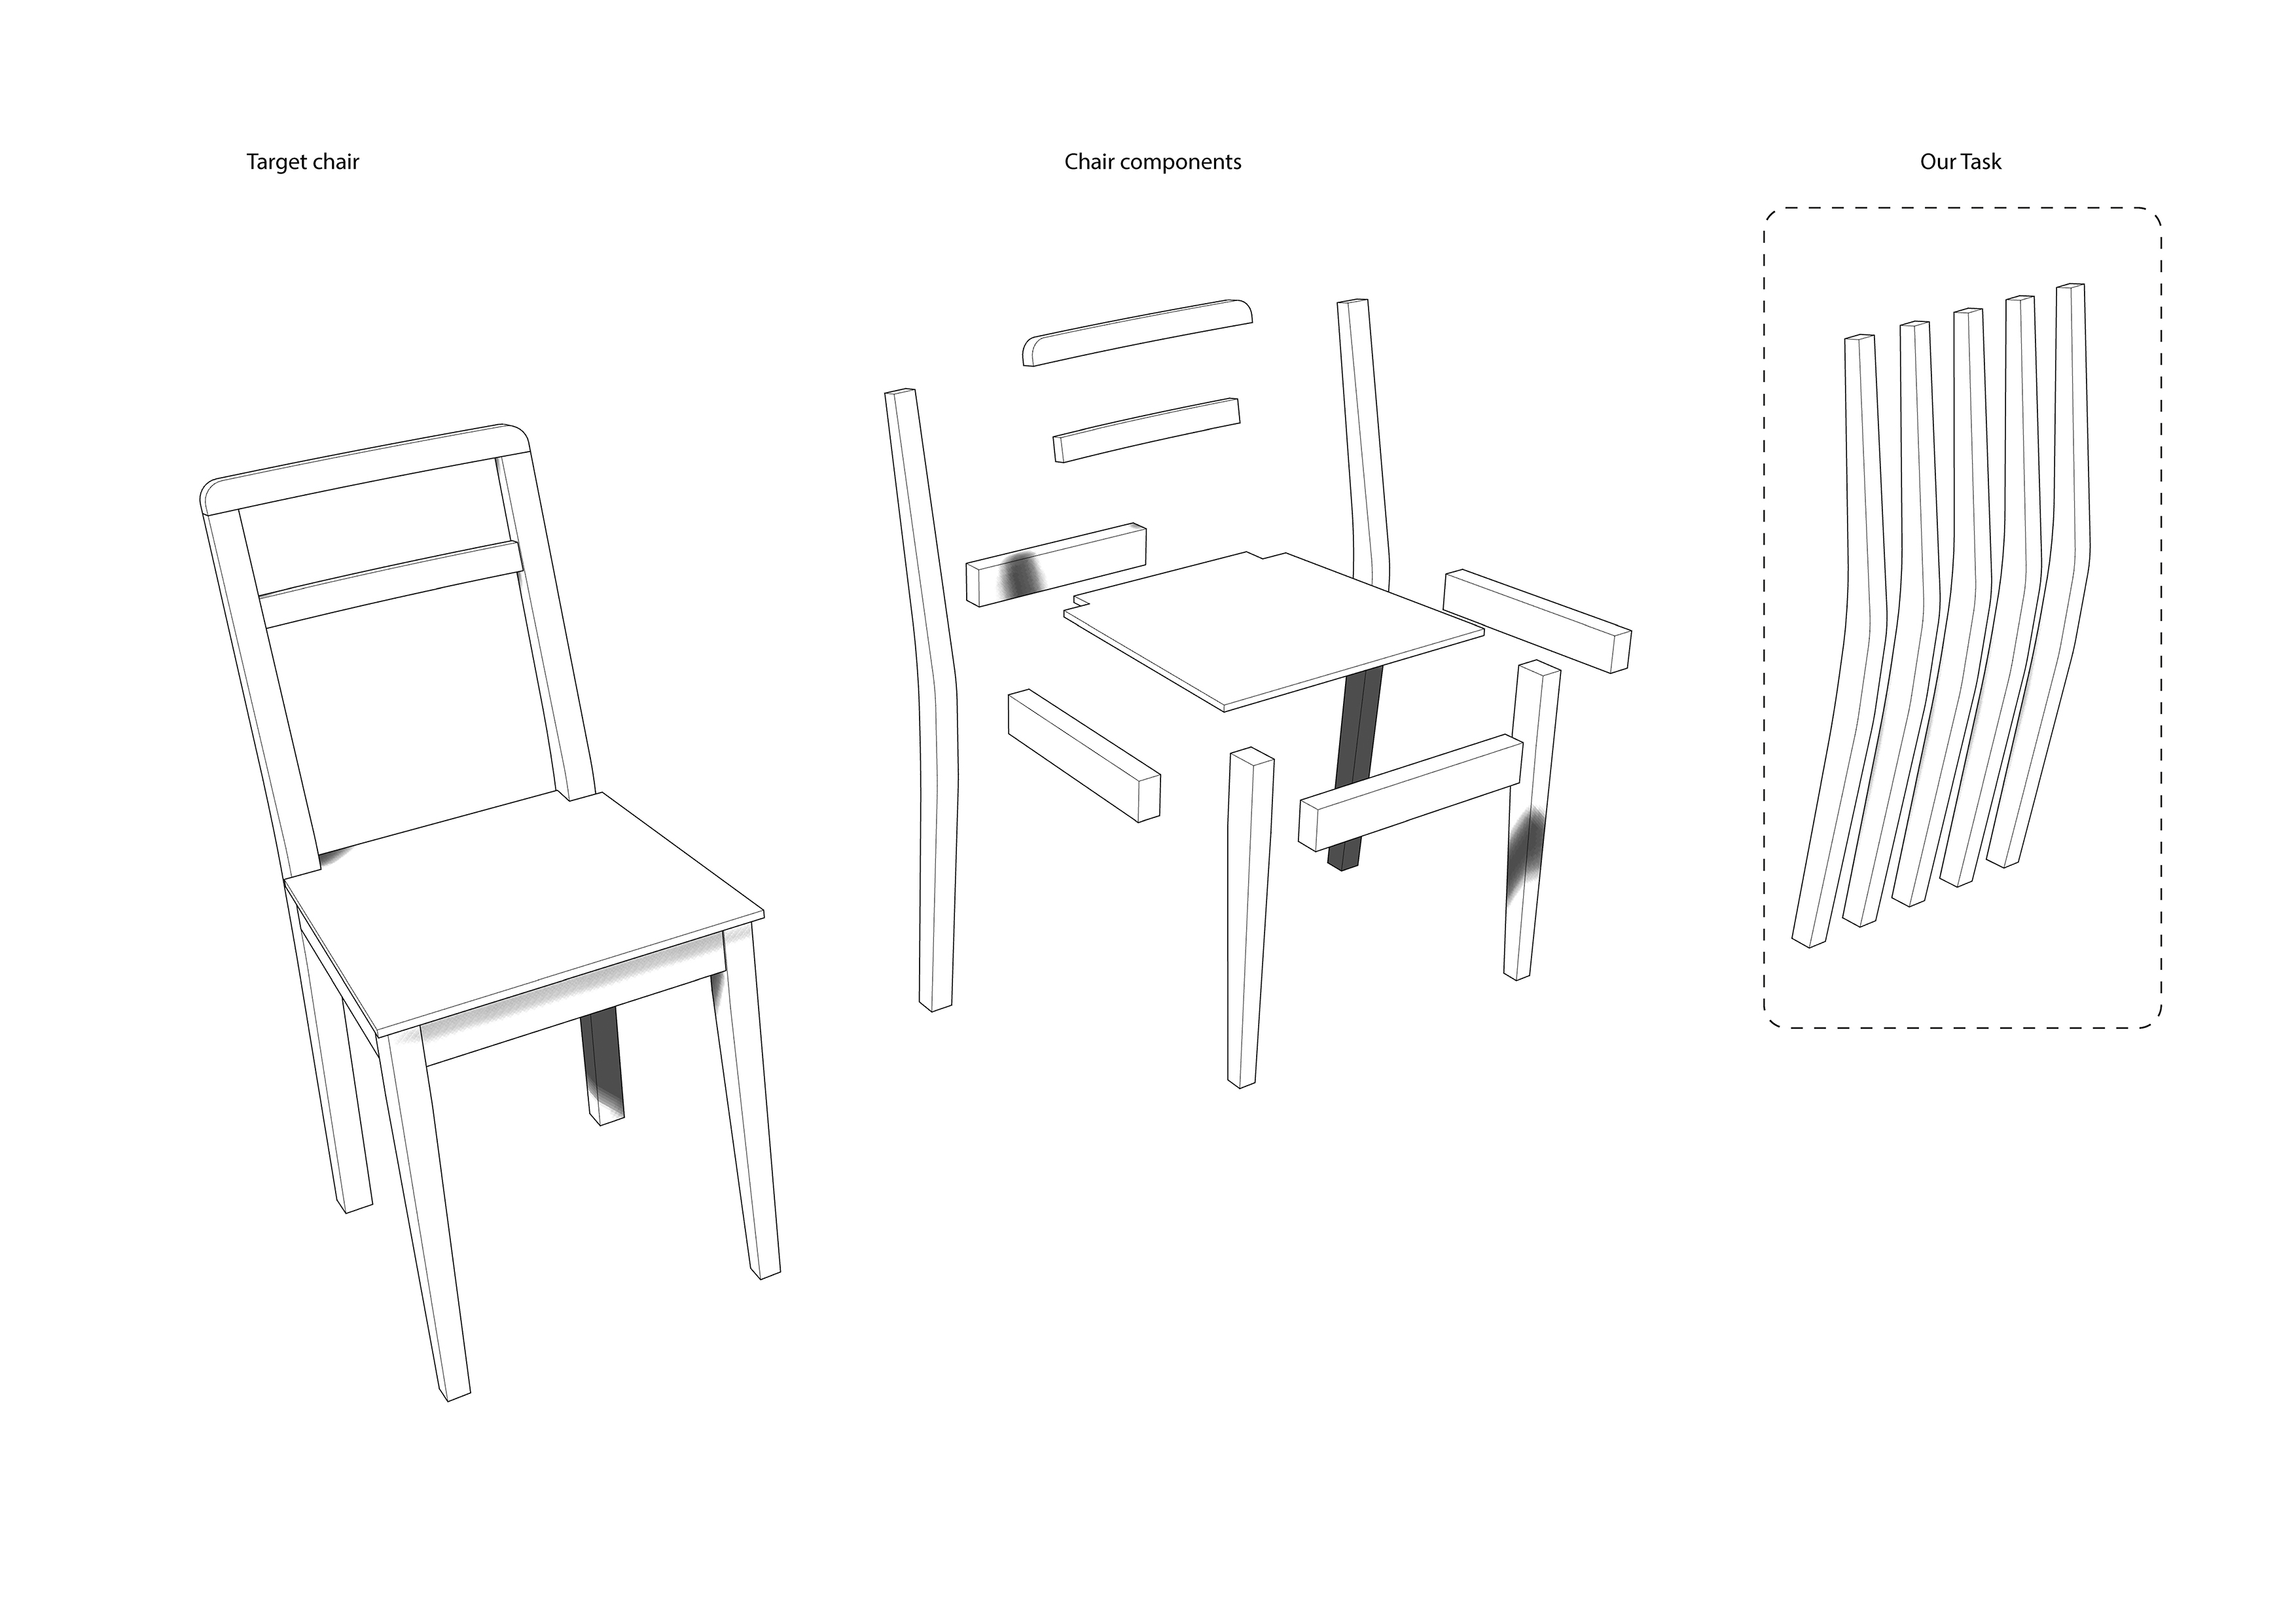
 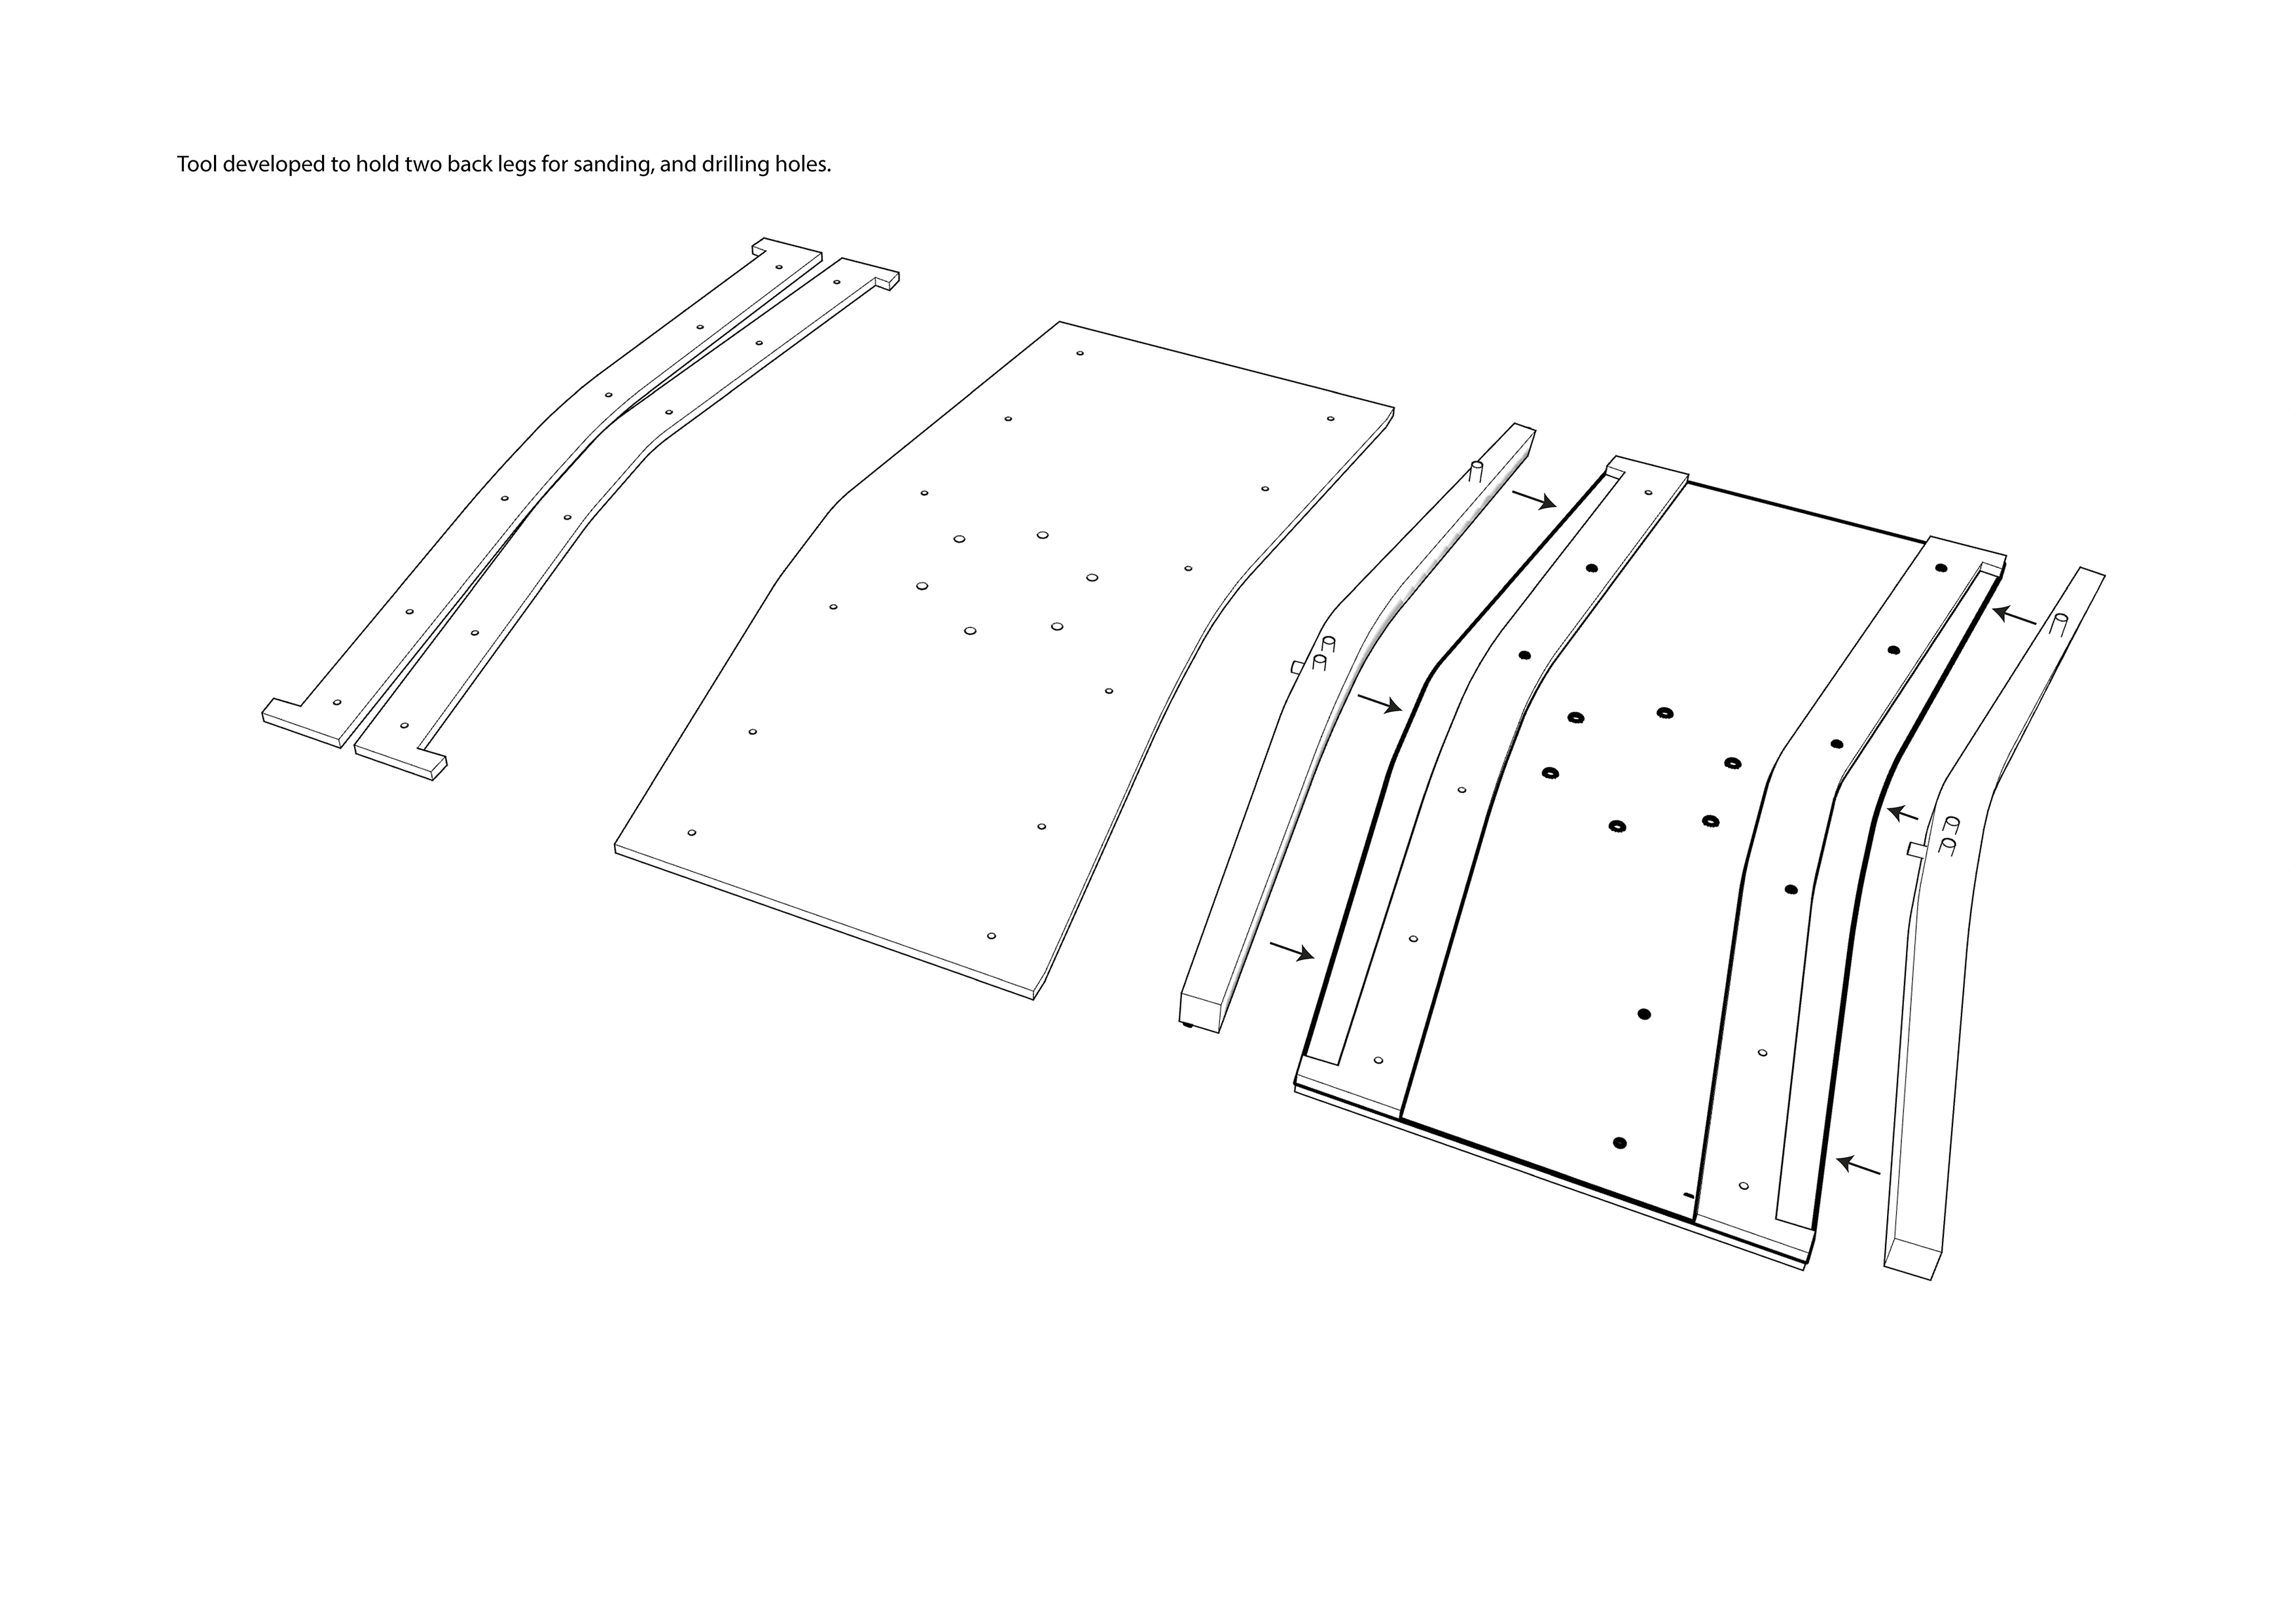 Another one of the task we had was to solve and optimize the position of the different components in order to get as much possible chairs with a given board of 4111 x 1220 mm. We decided to organice the pieces with the purpose of grouping them in small rectangular pieces of wood that could be easily set in the kuka cutting table.
 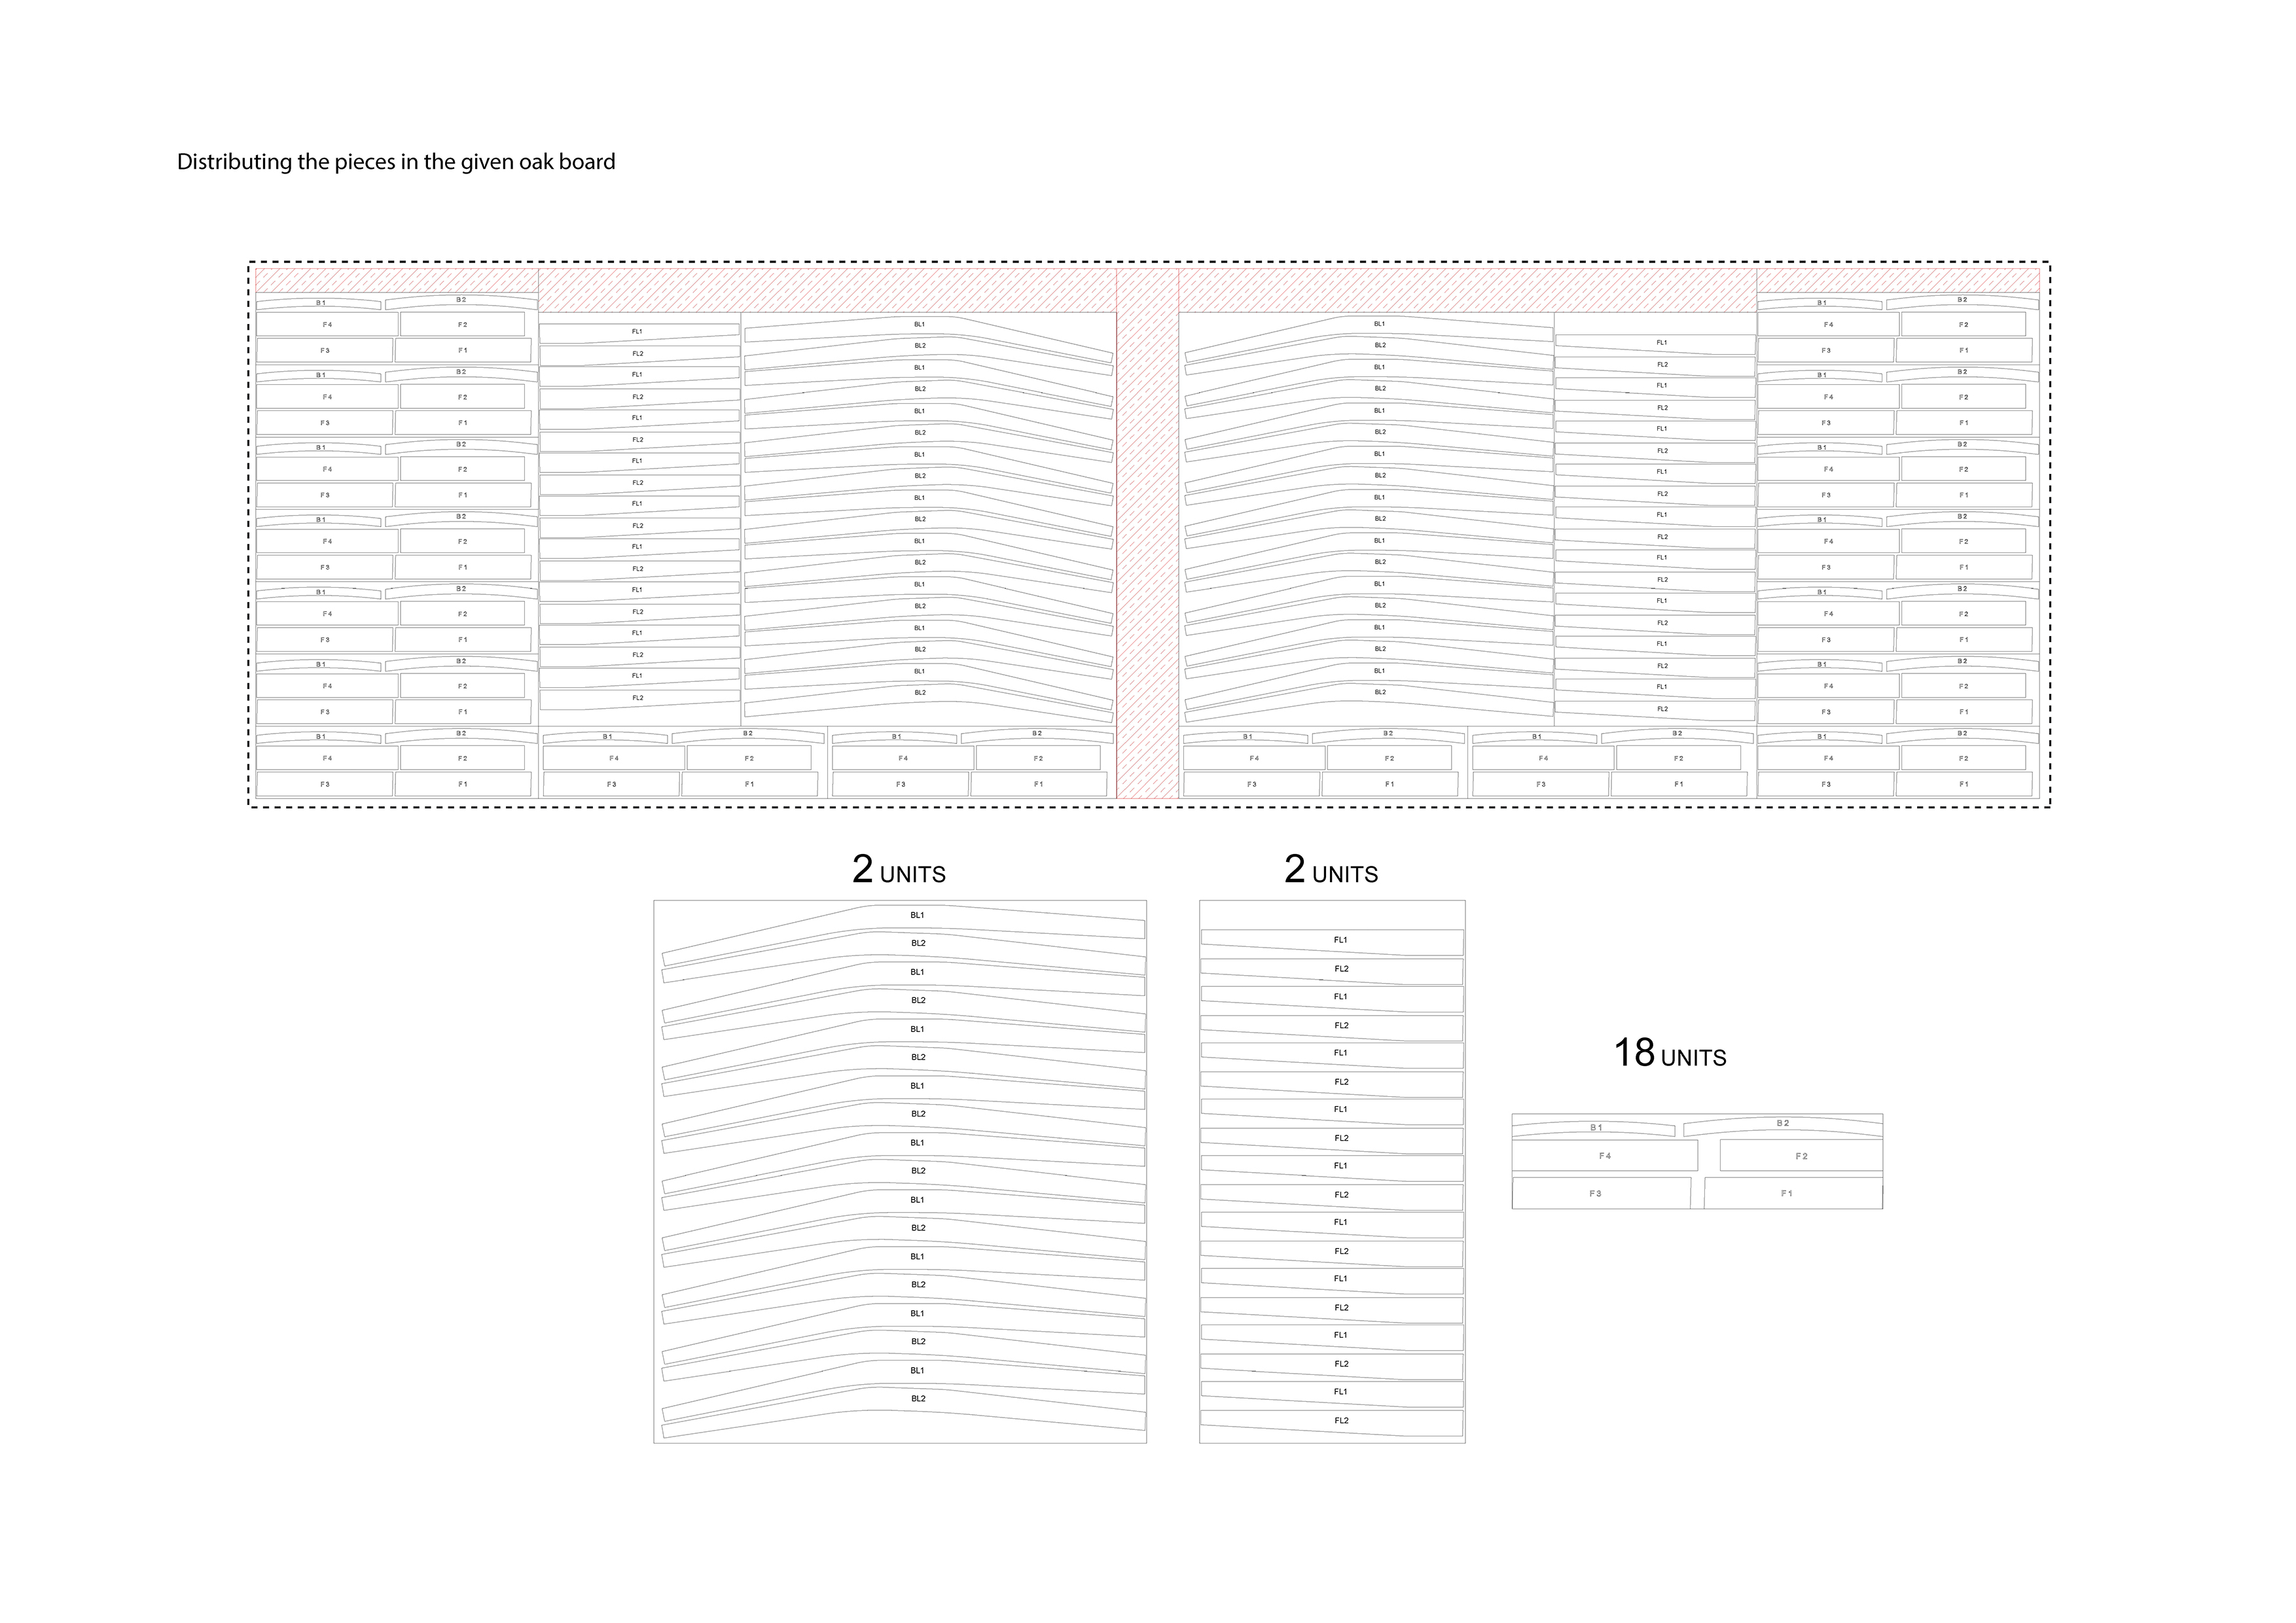 Precision, precision precision. These were the instructions we had to follow during every single draft, plan, drawing and execution that we started. The “Swiss precision” tought us how to master some tricks and skills in the process of chair-making and confront our outcomes with double or tripple examination of the measurements and dimensions. The workshop aimed to challange us with a down to earth approach of what are the tasks in a carpentry. This “micro carpentry” has become “macro” with the implementation of KUKA- the robotic arm at the verge of next innovations that can still be controlled profesionally by not so many people in the world. The implementation of machinery made us rething what scale and effort is micro-carpentry and how the industrial approach can evolve from that.